Jury-rigging. Backwoods engineering. Cobbling. Call it what you want… at some point we’ve all encountered a situation where we’ve had to improvise and come up with a solution that isn’t exactly according to Hoyle. We’ve had some real doozies that make us practically hear Larry the Cable Guy yelling “Git-R-Done!”. For moral and legal reasons we won’t publish some of the real hum-dingers, but here are a few of our favorites that don’t involve explosions or imminent trips to the emergency room. As with any other garage project, make sure to wear your safety glasses and any other personal protective equipment that may be necessary!
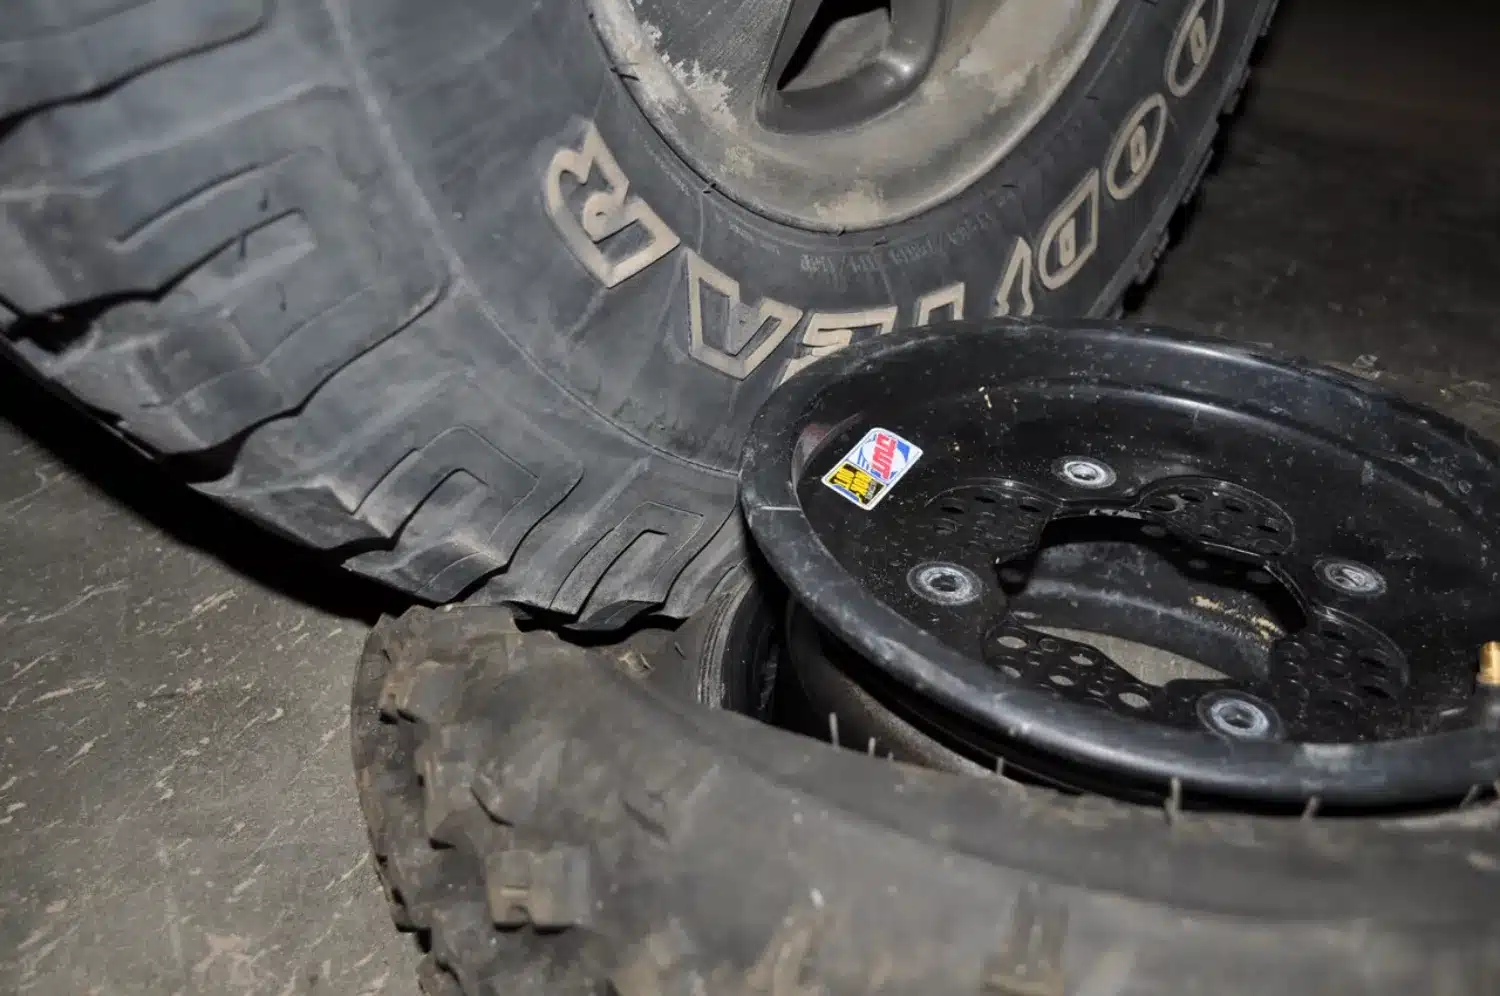
Backyard Bead Breaker
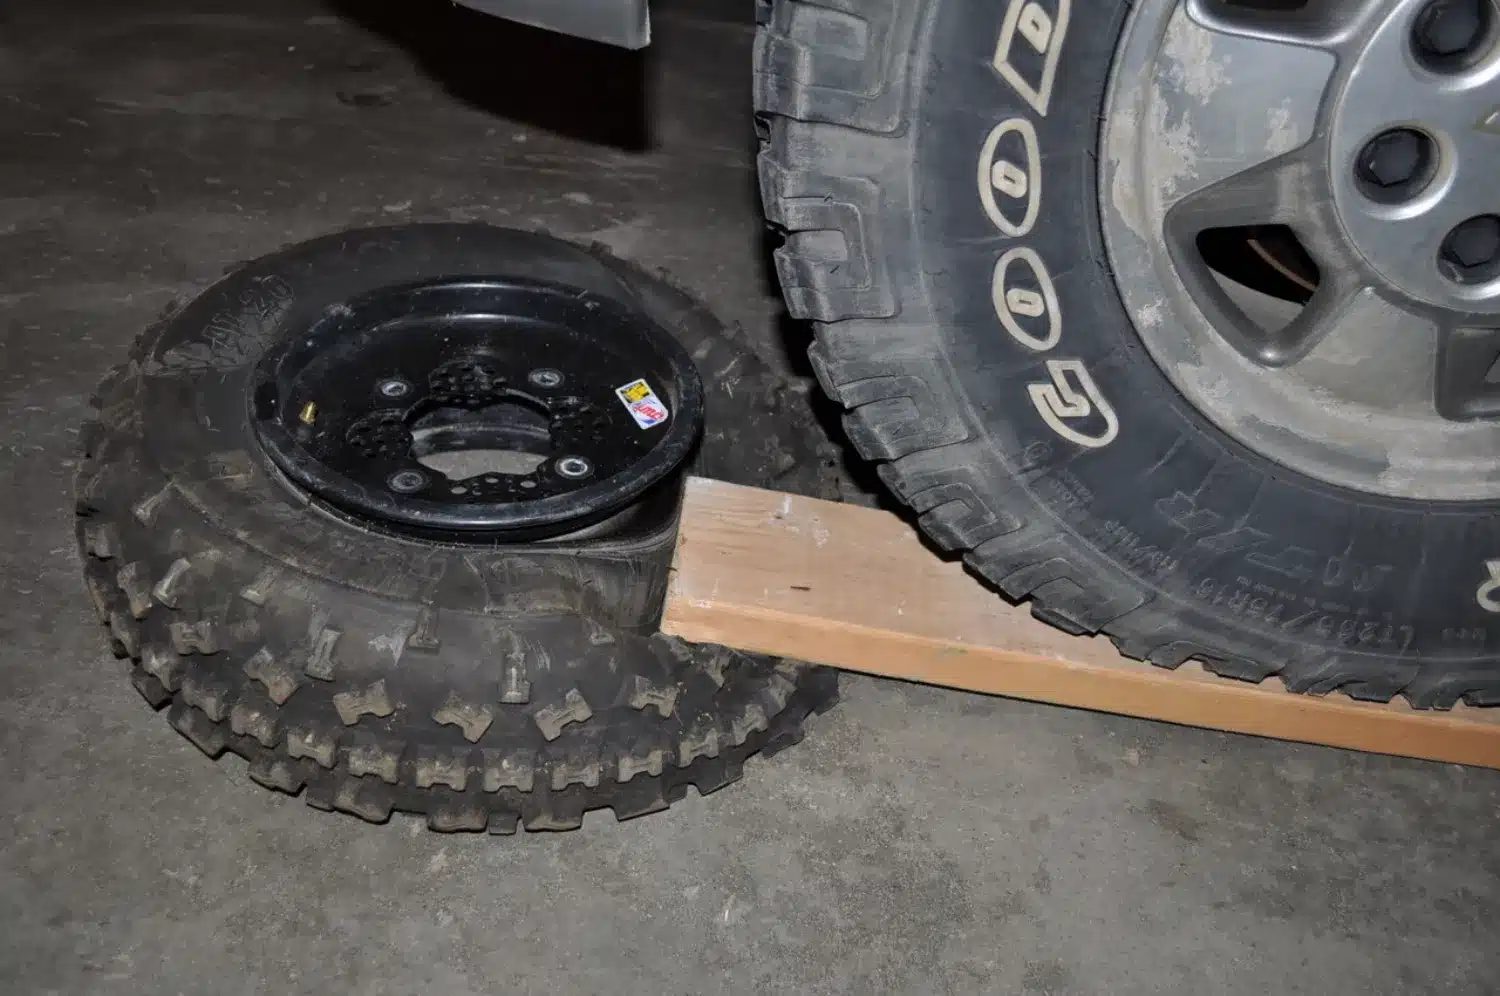
Sure, it would be nice to have a top-notch tire machine, but chances are you don’t. Rather than paying the local tire shop to break the bead on your ATV tires, give this trick a try. Remove the valve stem from the tire you’re trying to break down. Position it on its side put the end of a sturdy plank of wood on the sidewall of the tire, as close to the bead as possible. Roll your truck, car, or another wheeled vehicle slowly up the plank. Metal ramps might also be ok to use but if its corners are to sharp, put a small piece of wood right on the edge of the rim underneath the ramp. The homemade pair we’ve been using for over 10 years is actually perfect for this job because the tip of the ramp is shaped as a handle and made of a bent round metal rod. It may take some patience and sometimes a few tries, but this will push the tire off the bead about 90% of the time! Tip: a light application of silicone spray where the bead meets the rim will help it come off easier.
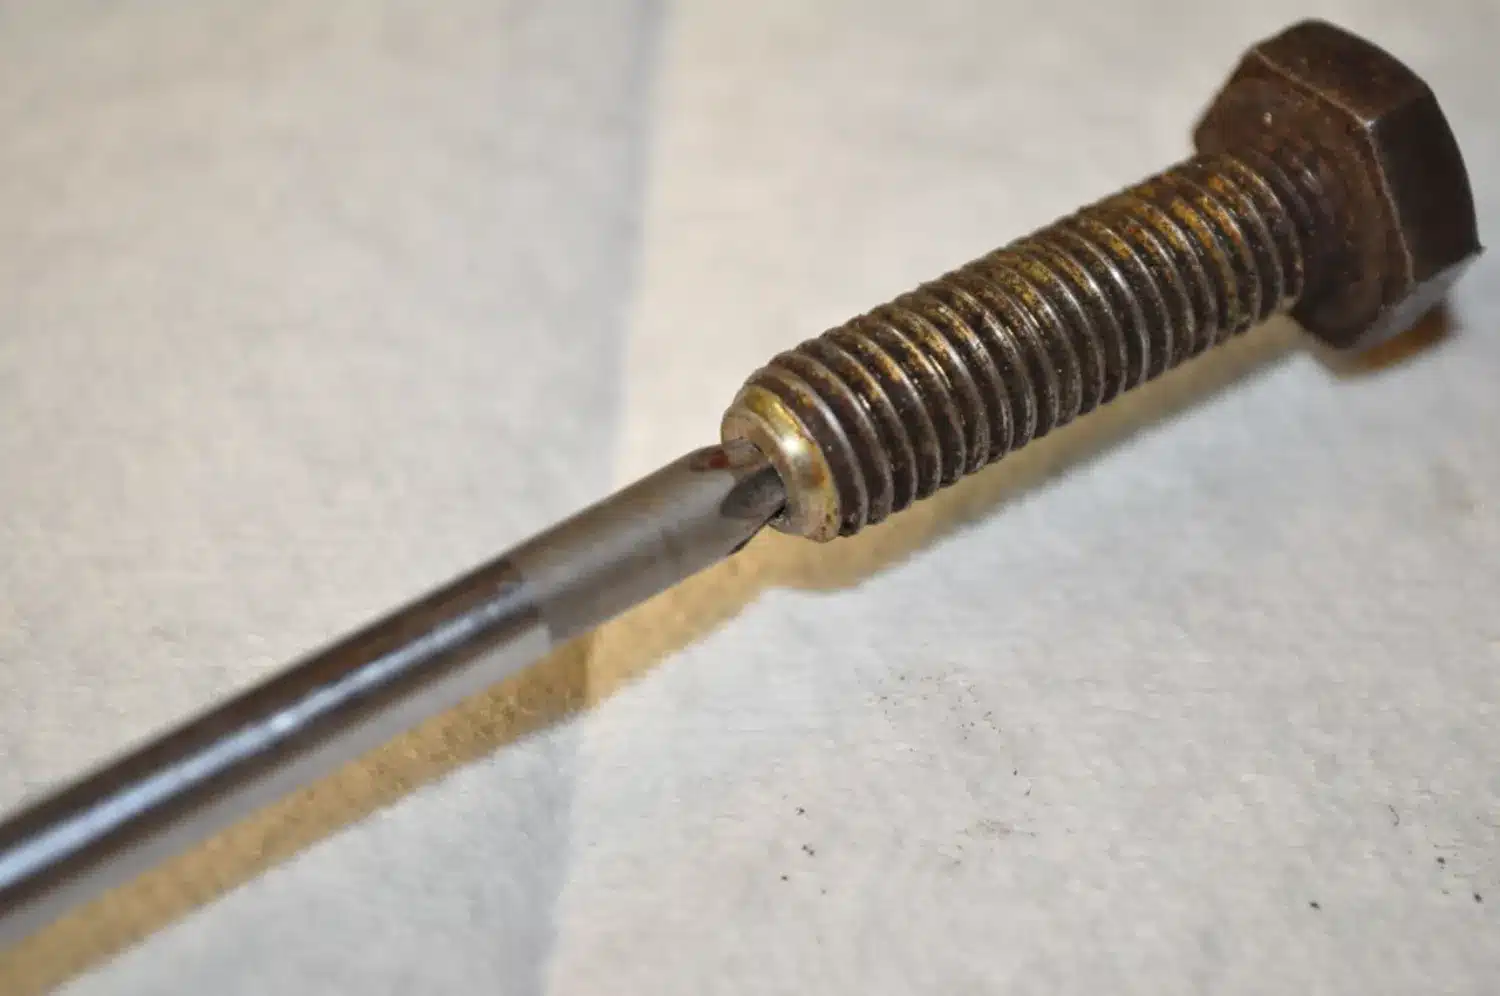
Poor Boy’s Easy-Out
There comes a time in life when you’ve encountered a broken-off bolt that’s flush with the surface, and if you are close with our own Johnny-9 you may have had more of these times than a typical person! Most people won’t have an actual easy-out, but there is a reasonably good chance that this trick will work for you. You’ll need to drill a hole into the broken bolt, and a good rule of thumb is that it should be around half of the size of the diameter of the bolt. The bigger the hole, the more tension you’ll remove… but be careful not to get so big that you’ll get into the threads if you don’t drill it perfectly straight (chances are that you won’t). Once you have the hole drilled, find a TORX driver or socket that’s slightly larger than the hole. You want it just large enough that the splines will engage the hole firmly but not have to be hammered in too hard! Once it’s tapped into place, hold the handle firmly and gently try to remove the broken fastener. Odds are that if this won’t take the bolt out, then you were headed for a lot more work (and probably a heli-coil) in the first place! Tip: use a torx driver that has a replacement guarantee, so you can get a new one if you gnarl up the blade splines.
Cheater Impact Driver
If you’ve been around this sport for as long as we have, you’ve probably had a few stubborn phillips-head screws that don’t want to come loose. An impact driver is the preferred tool for the job, but a good regular phillips screwdriver and a hammer may just get you moving again. You want the best screwdriver in the box for maximum bite. While applying a steady and firm counter-clockwise torque on the screwdriver, firmly tap on the handle of the screwdriver with a hammer (note that we didn’t say SMACK). The pressure and vibrations from tapping on the screwdriver are often enough to get the threads to relax and loosen up. Tip: once again… a lifetime warranty screwdriver is the best option, and don’t be afraid to warranty them when the blades start to lose their sharp edges.
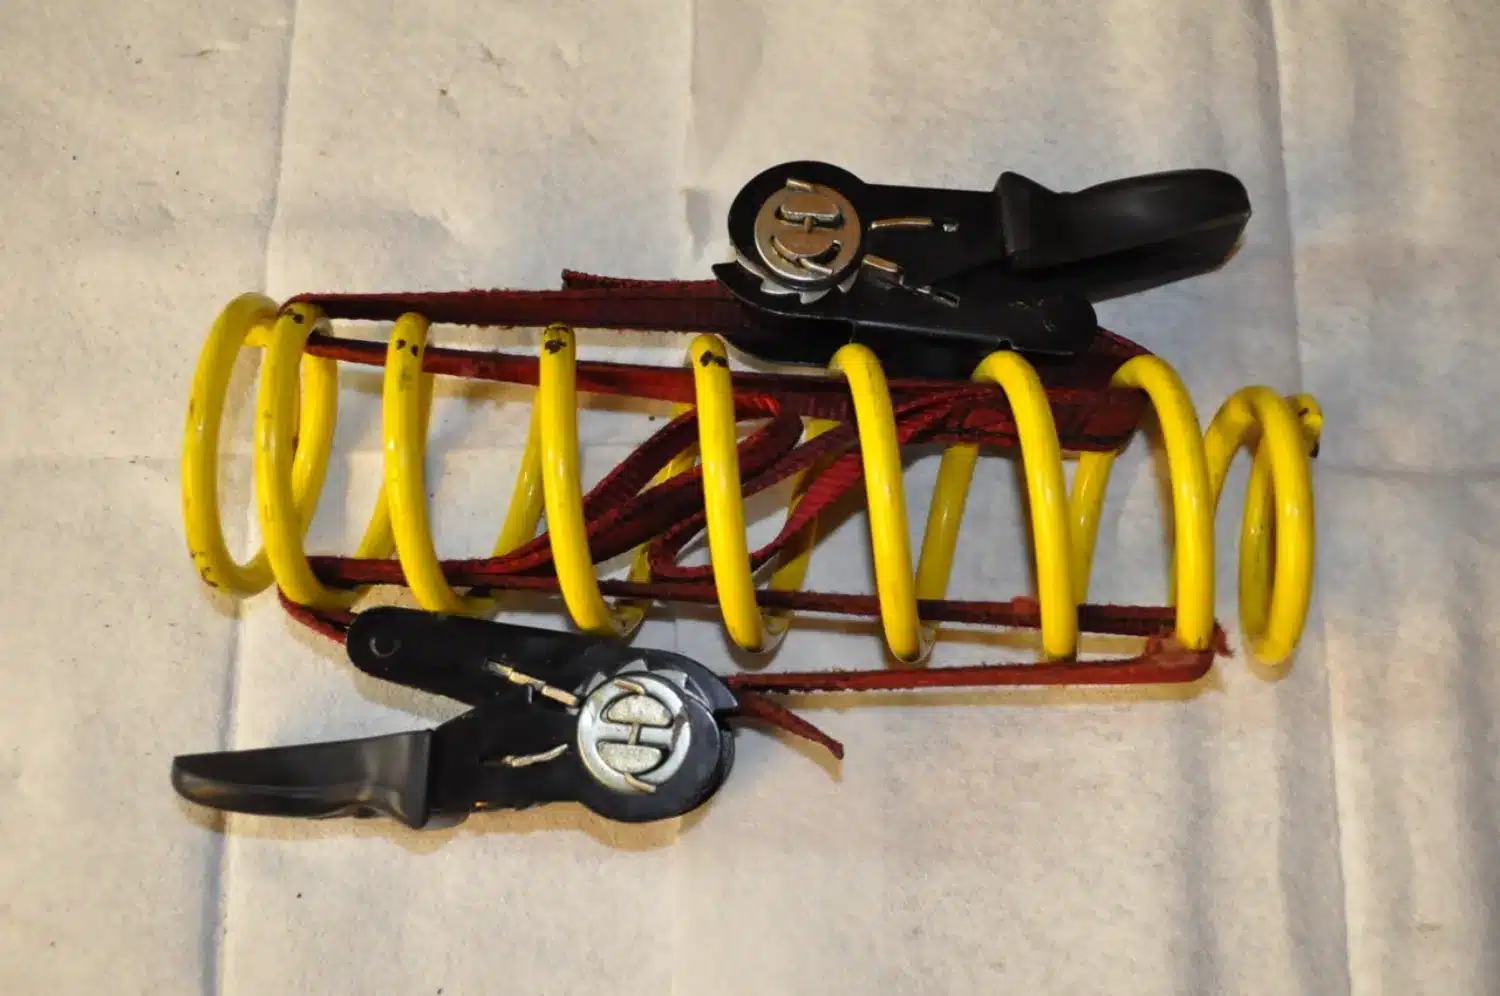
Makeshift Coil Compressor
Sometimes you have to remove the spring from a shock and don’t quite have the grip to hold the spring compressed and remove the spring retainer at the same time. If Santa keeps forgetting to bring you that spring compressor you’ve always wanted but been too cheap to buy, you might still be able to get yourself out of the jam. We have a pair of customized ratcheting tie downs just for this purpose. Cut the hooked off from the end of the tie down that has the ratchet attached (use a lighter to melt and seal the loose threads after cutting). Feed the cut-off end of the tie down behind the spring to capture as many coils as possible, and loop it back around to the ratchet. ALWAYS use two of these placed 180 degrees from each other to keep the tension even! Going only one or two clicks at a time, alternately tighten each ratchet until there is just enough tension on them so that the retainer is loose enough to remove. Don’t go crazy because every click of tension just adds to the “pop” when you have to release the ratchets. When it comes time to reinstall the spring, use a little bit of duct tape to hold the retainer to the spring, and make sure to keep your fingers out of the way of any pinch areas! Tip: use high quality tie downs because the ratchets are much less prone to bending. Also… use the shock’s preload adjuster to take up any gap in between the spring and the retainer before you release the ratchets. This will eliminate or reduce the “pop” when you release the ratchets.
These are just a few tips that might save you a trip to the tool store or the dealership, and with a little creative thought you can come up with a lot more. Just always make sure to exercise caution and wear your safety equipment.