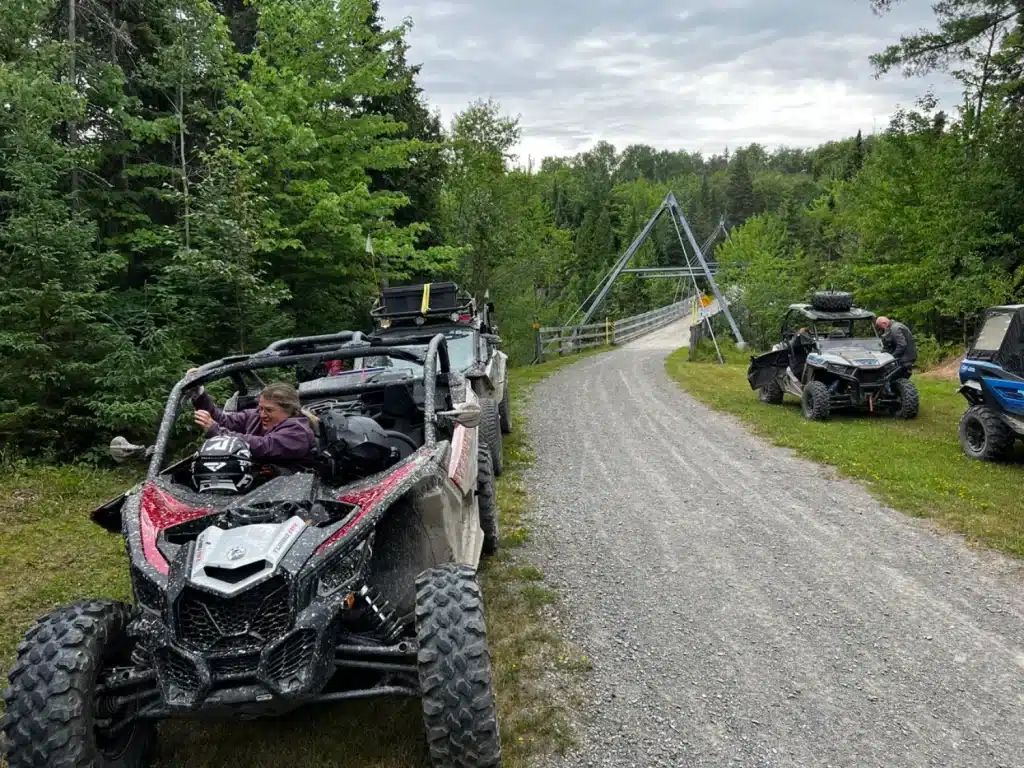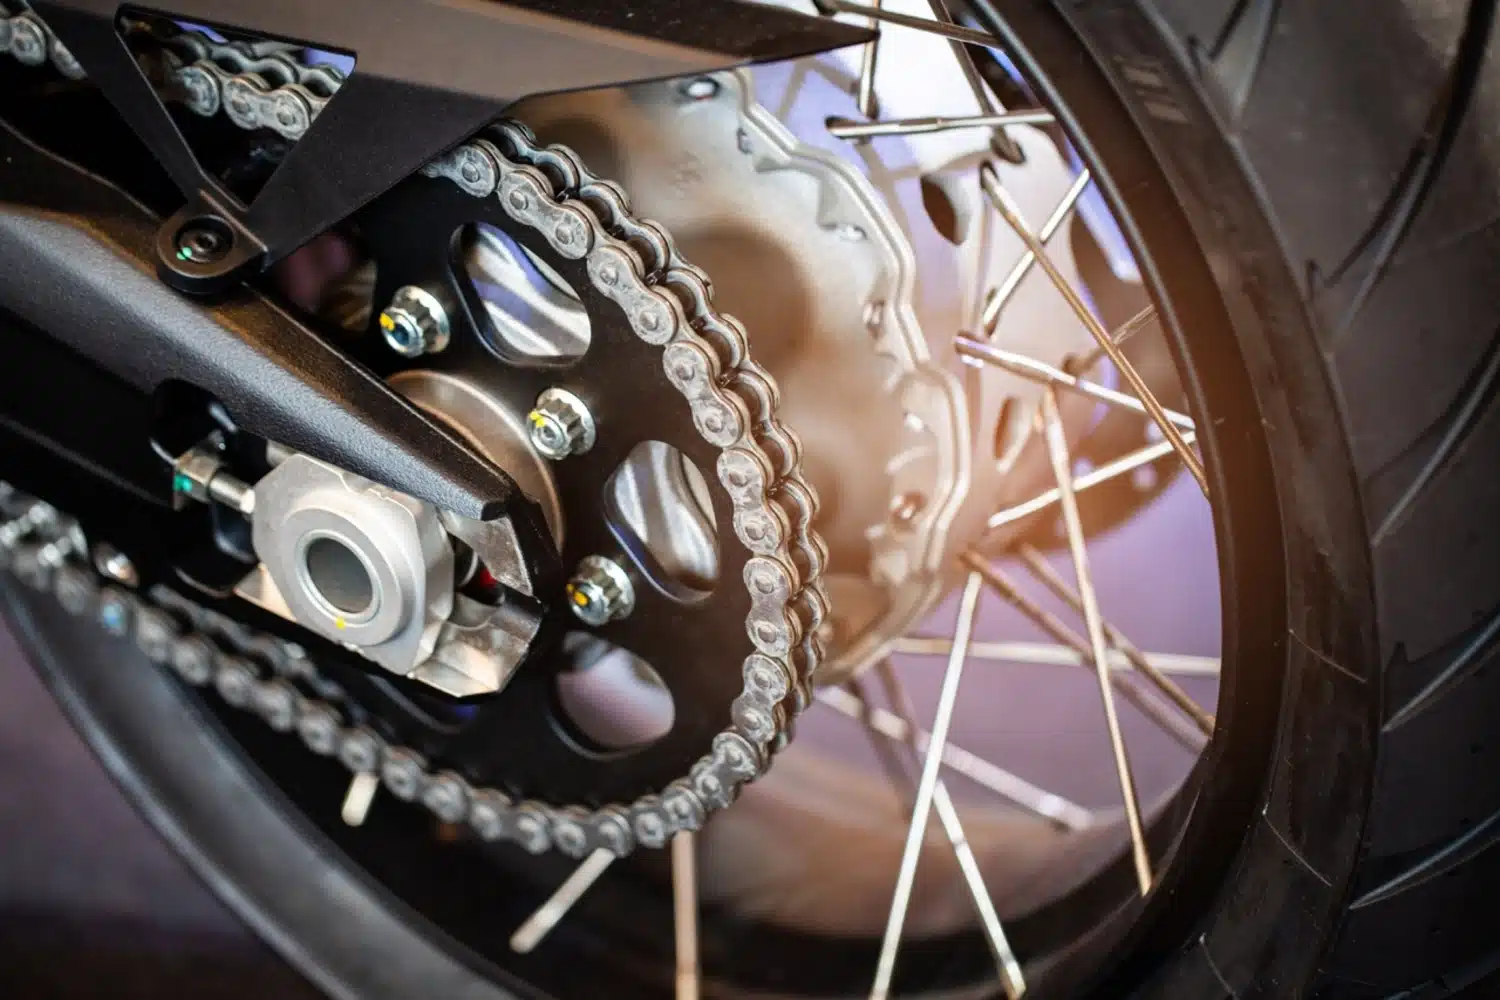
The chain is still very popular when it comes to transmitting power from the engine to the wheel of your motorcycle. Some riders prefer the belt, others the drive shaft. Despite the rider’s preference, the manufacturer has the final word. Although popular and well-loved, it also has some rather irritating shortcomings.
Let’s take a look at the chain’s irritants
A chain requires regular maintenance. Lubrication is inevitable. Then, when the bike is running, the chain takes great pleasure in spreading droplets of this rather sticky lubricant. You’ll find it all over the rear wheel and even down to the luggage. Diluting this greasy lard in order to clean it up is not effortless and very unpleasant. The second drawback is its lifespan. The average chain and sprocket assembly lasts between 20,000 and 30,000 kilometers. Maintenance, the quality of the assembly, conditions of use and the frame’s vocation all have a considerable influence on its lifespan.
Let’s look at the good points too
One of the advantages of a chain and sprocket assembly is monetary. Another is its ability to transmit energy, as the chain offers very little resistance to rotating. So there’s less loss of energy between motor and wheel. A third advantage is the possibility of modifying the drive chain ratio without major investment. All you have to do is change the size of the sprockets. A final advantage, much appreciated in off-road situations, is the possibility of repairing the chain directly at the roadside, which is totally impossible with other power transmission configurations.
Preparing the chain
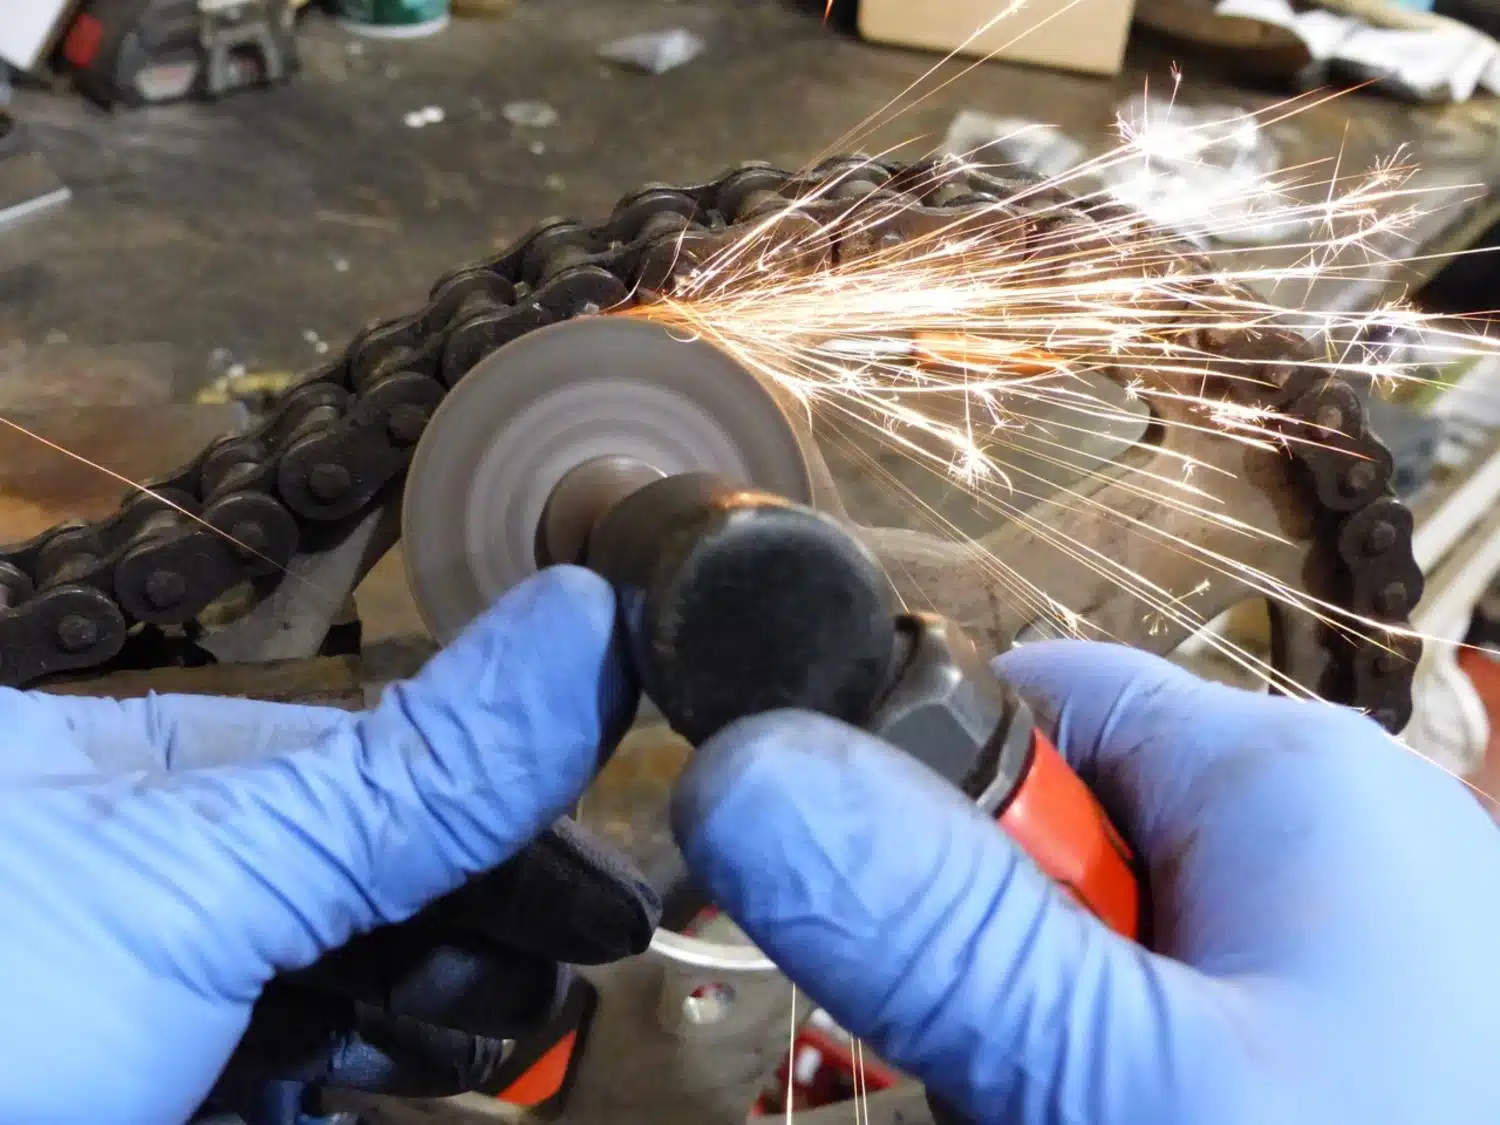
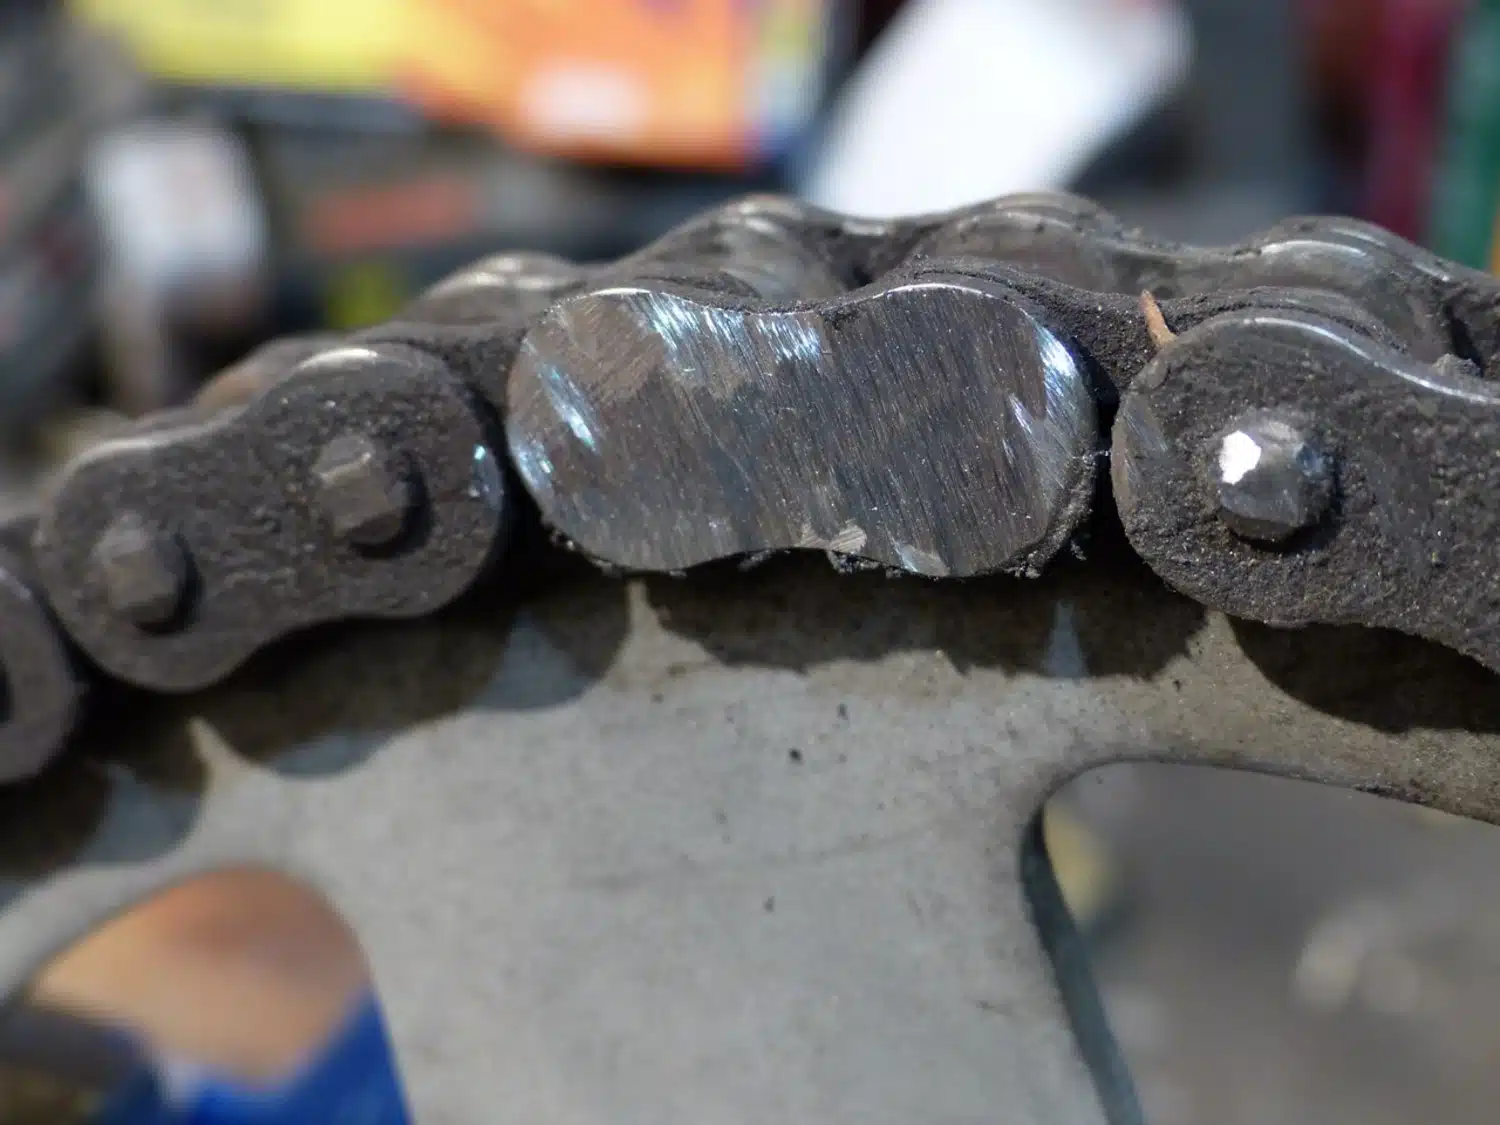
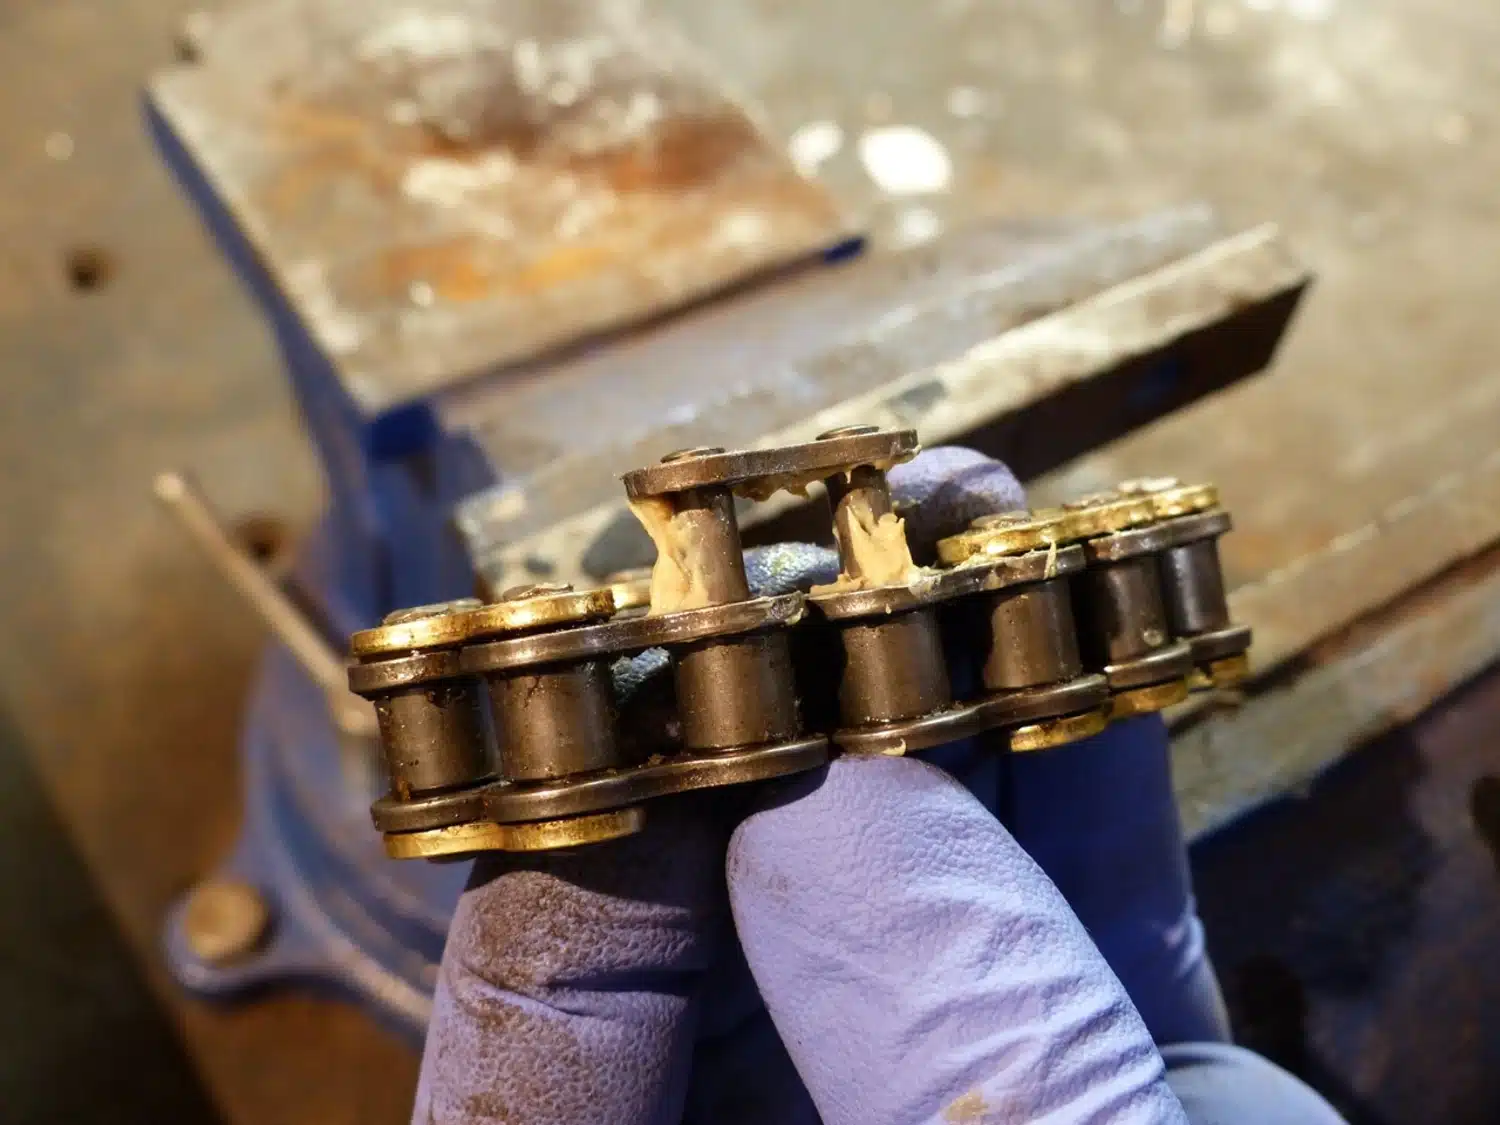
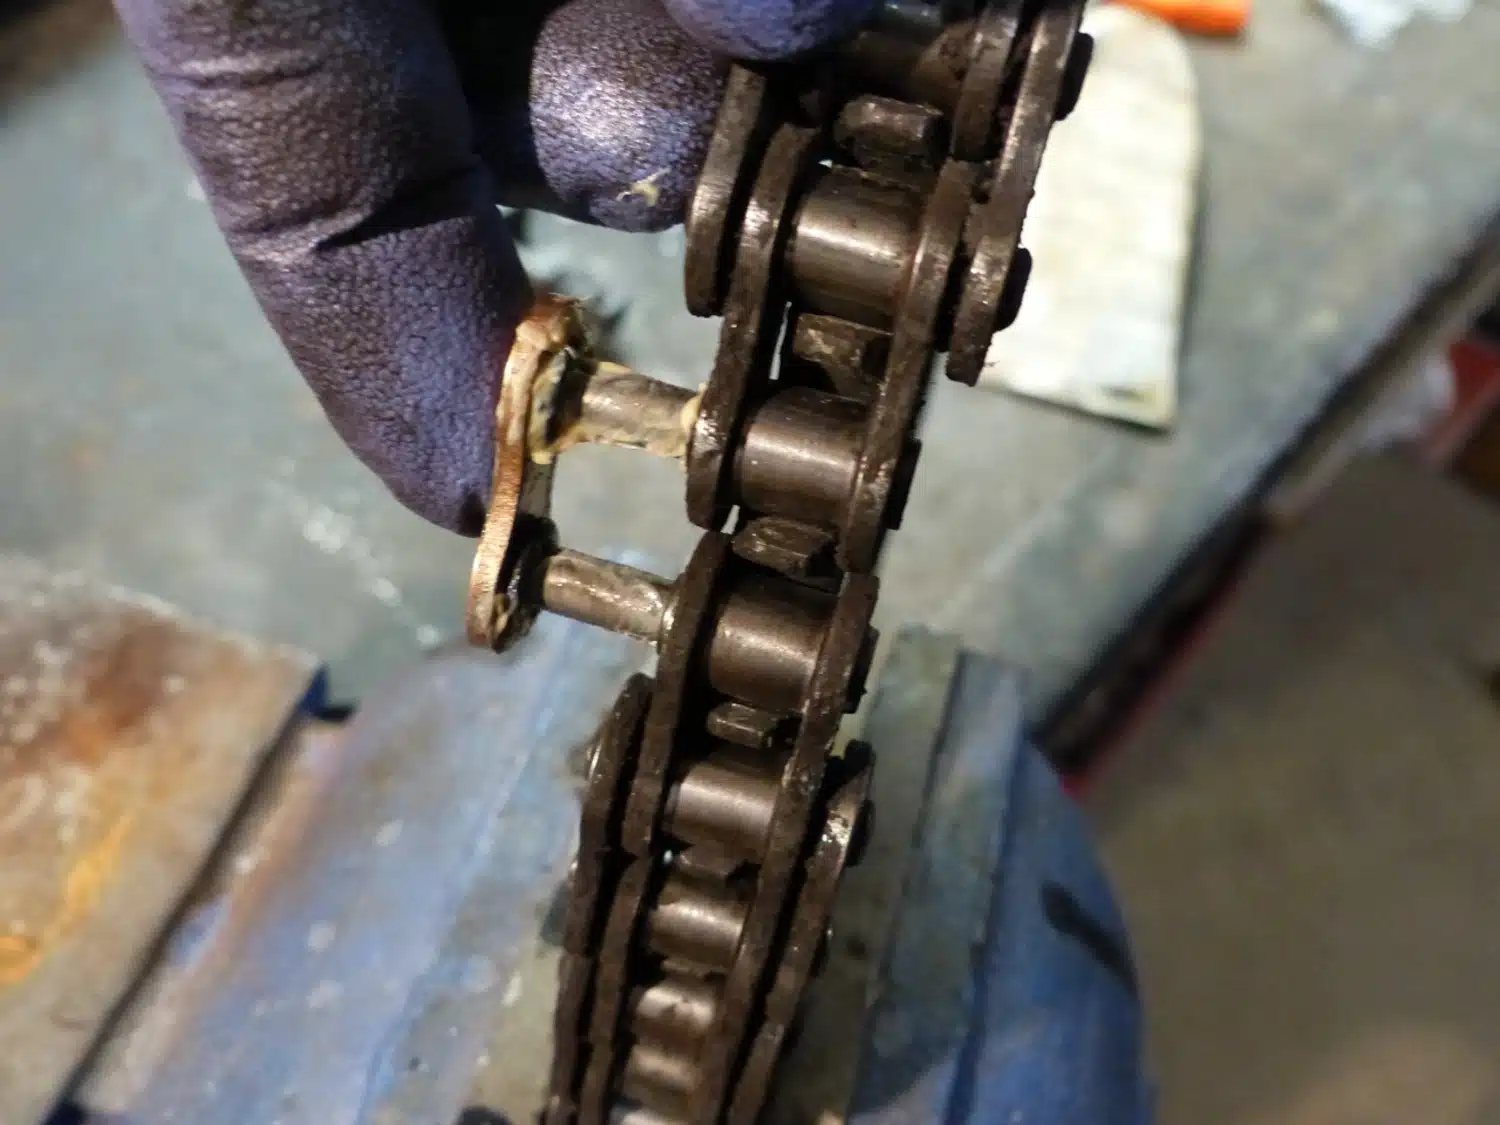
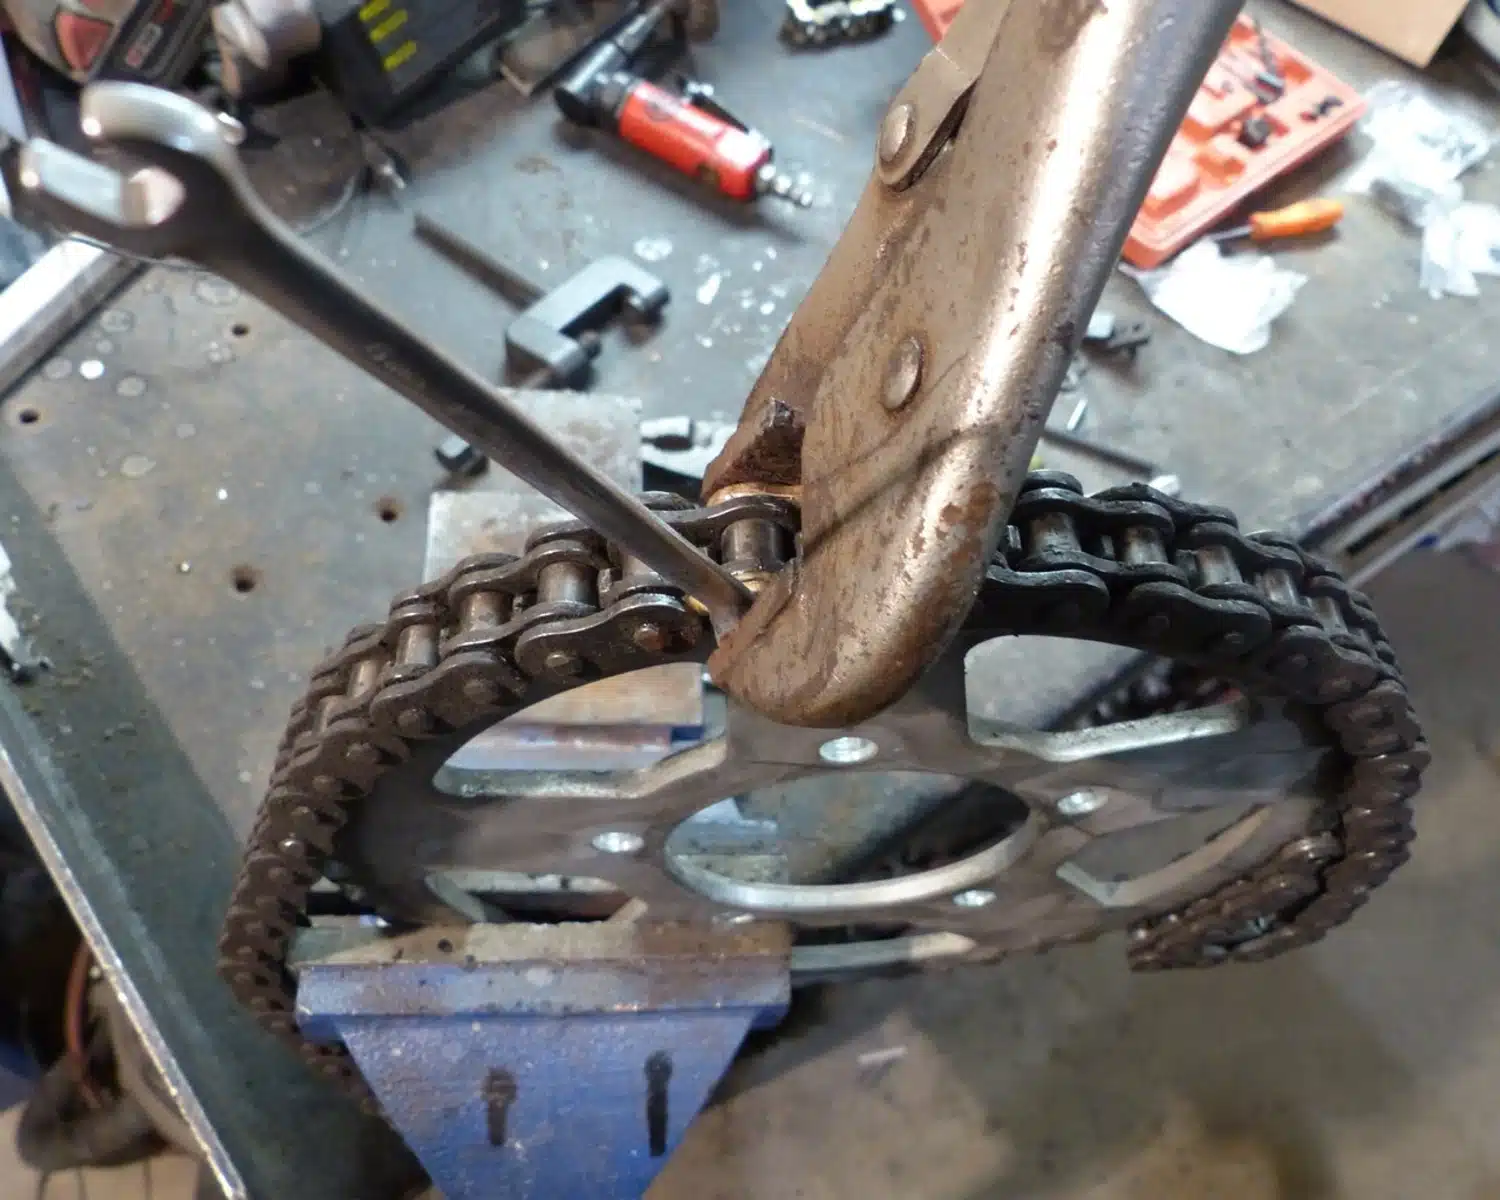
If the installation is due to a broken connecting link, simply remove the broken link. However, if the aim is to modify a chain length, it will be necessary to remove a riveted link. To do this, you’ll need a grinder. Use it to grind two chain rivets flush with the link. In this example, I’ve used a leftover dirt bike chain.
Next, using a chain cutter and rivet tool, drive out the chain pins one at a time. If the tool isn’t handy, a pin punch will do the trick.
The possibilities
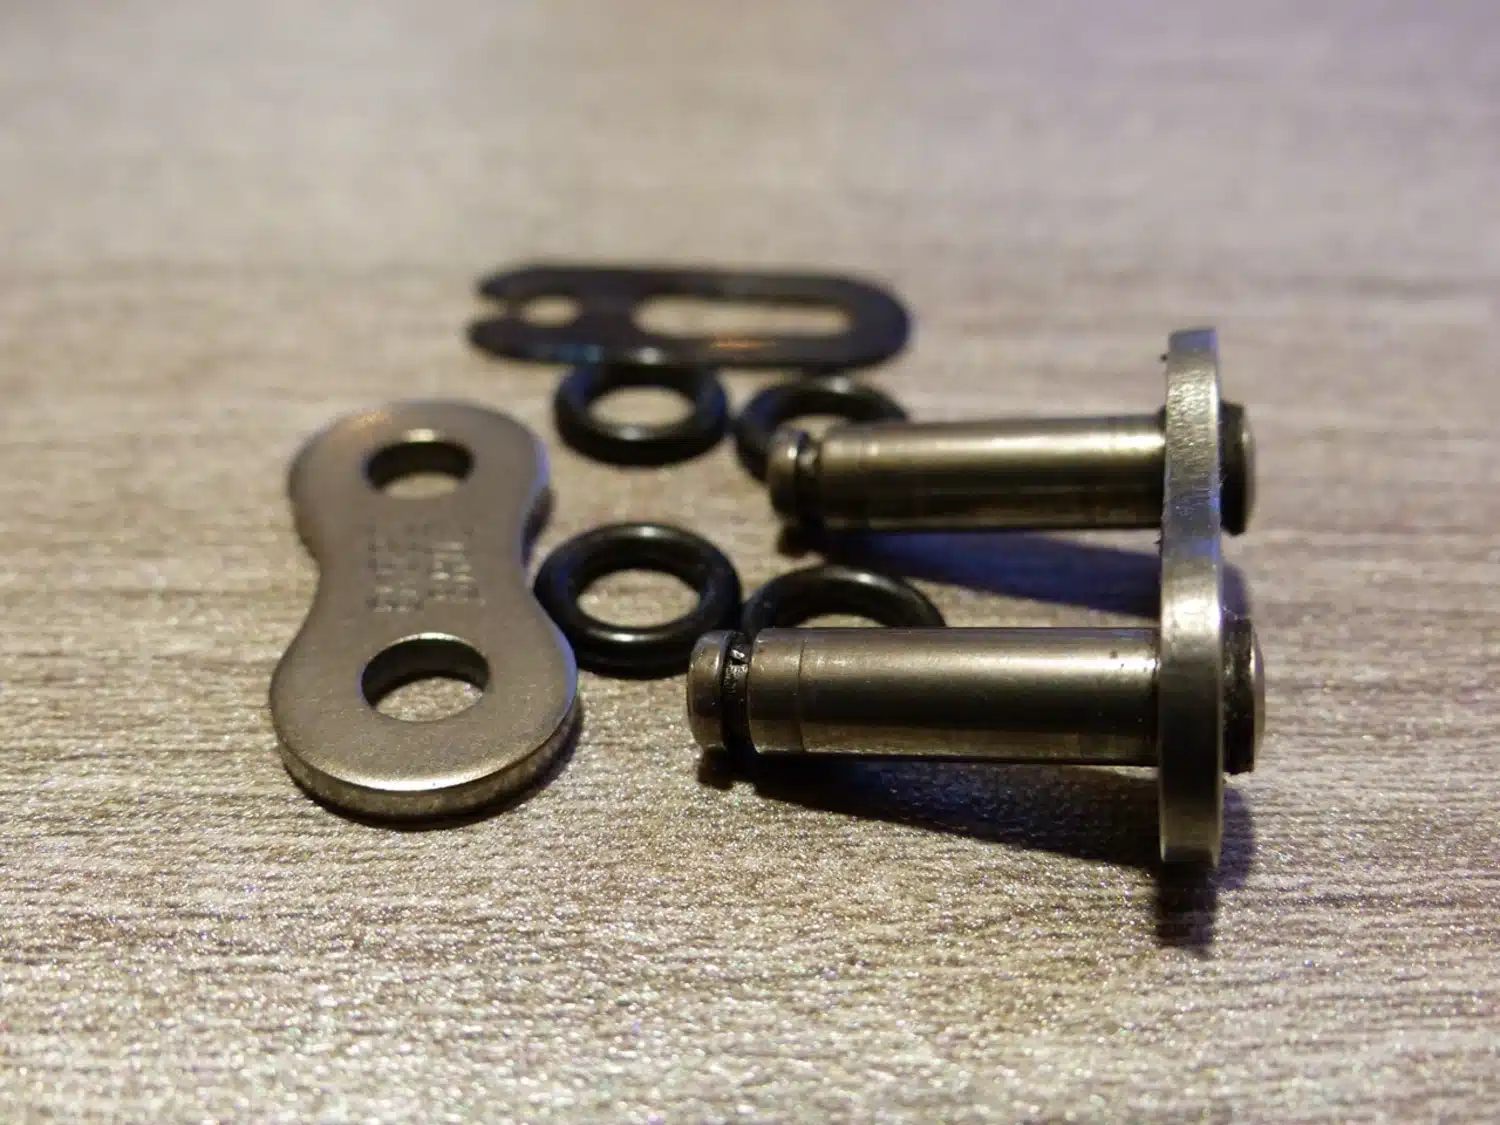
Several types of link are available on the market. To begin with, it’s important to check whether your frame is equipped with an O-ring or regular chain. Then it’s just a matter of choosing one of these models to match yours.
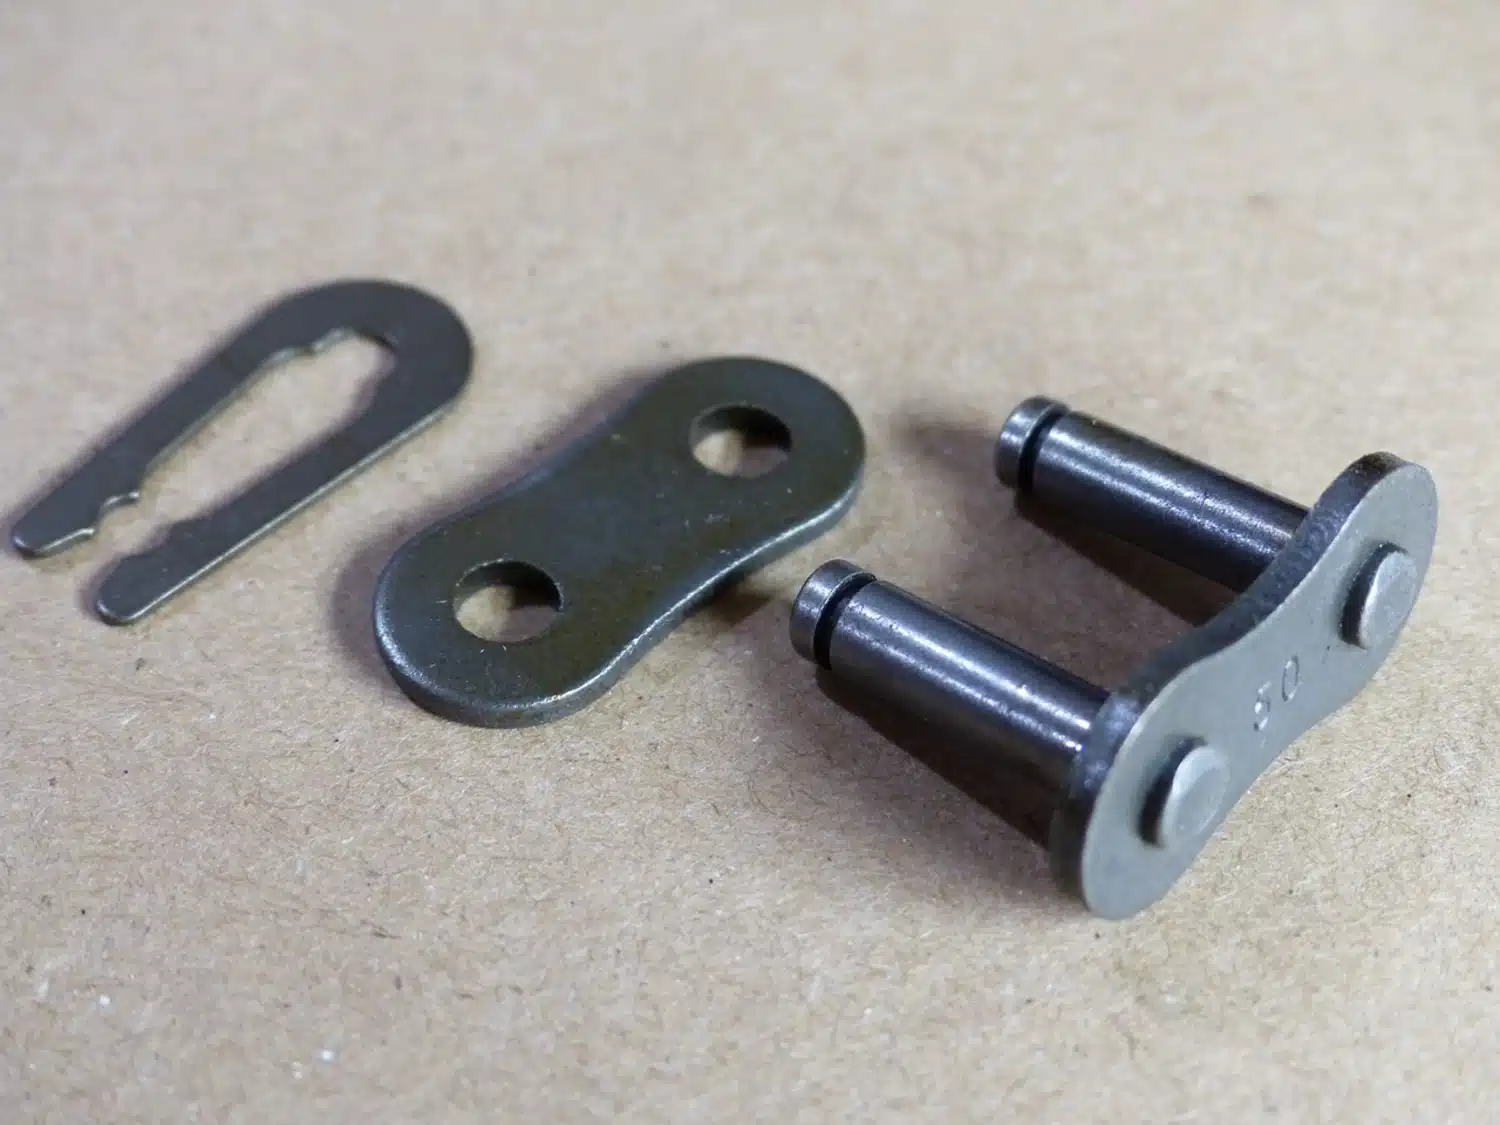
This link is the easiest to install. Lubricate the pin with grease. Connect the chain and push the link in. Add the opposite plate and finally the clip lock. A warning with the link lock: it must be installed in such a way that when the motorcycle is moving forward, the open side of the clip is not towards the direction of rotation of the chain. This will prevent the clip from being pulled out of the link by catching on debris.
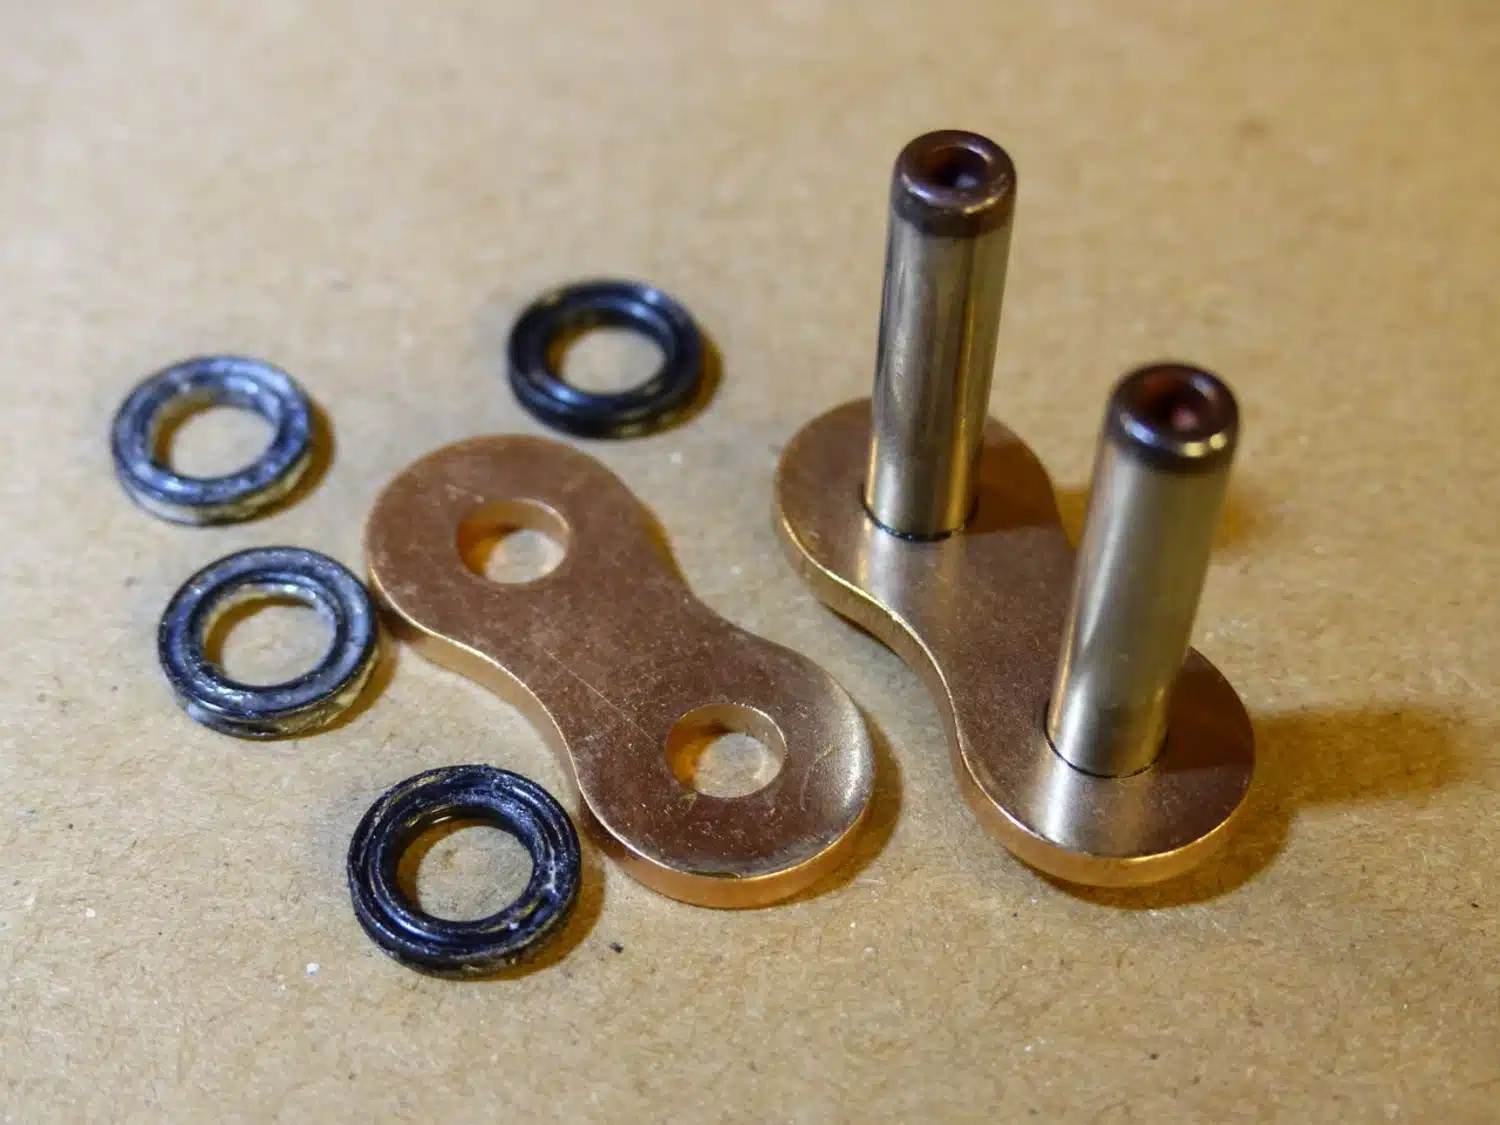
O-ring link and clip
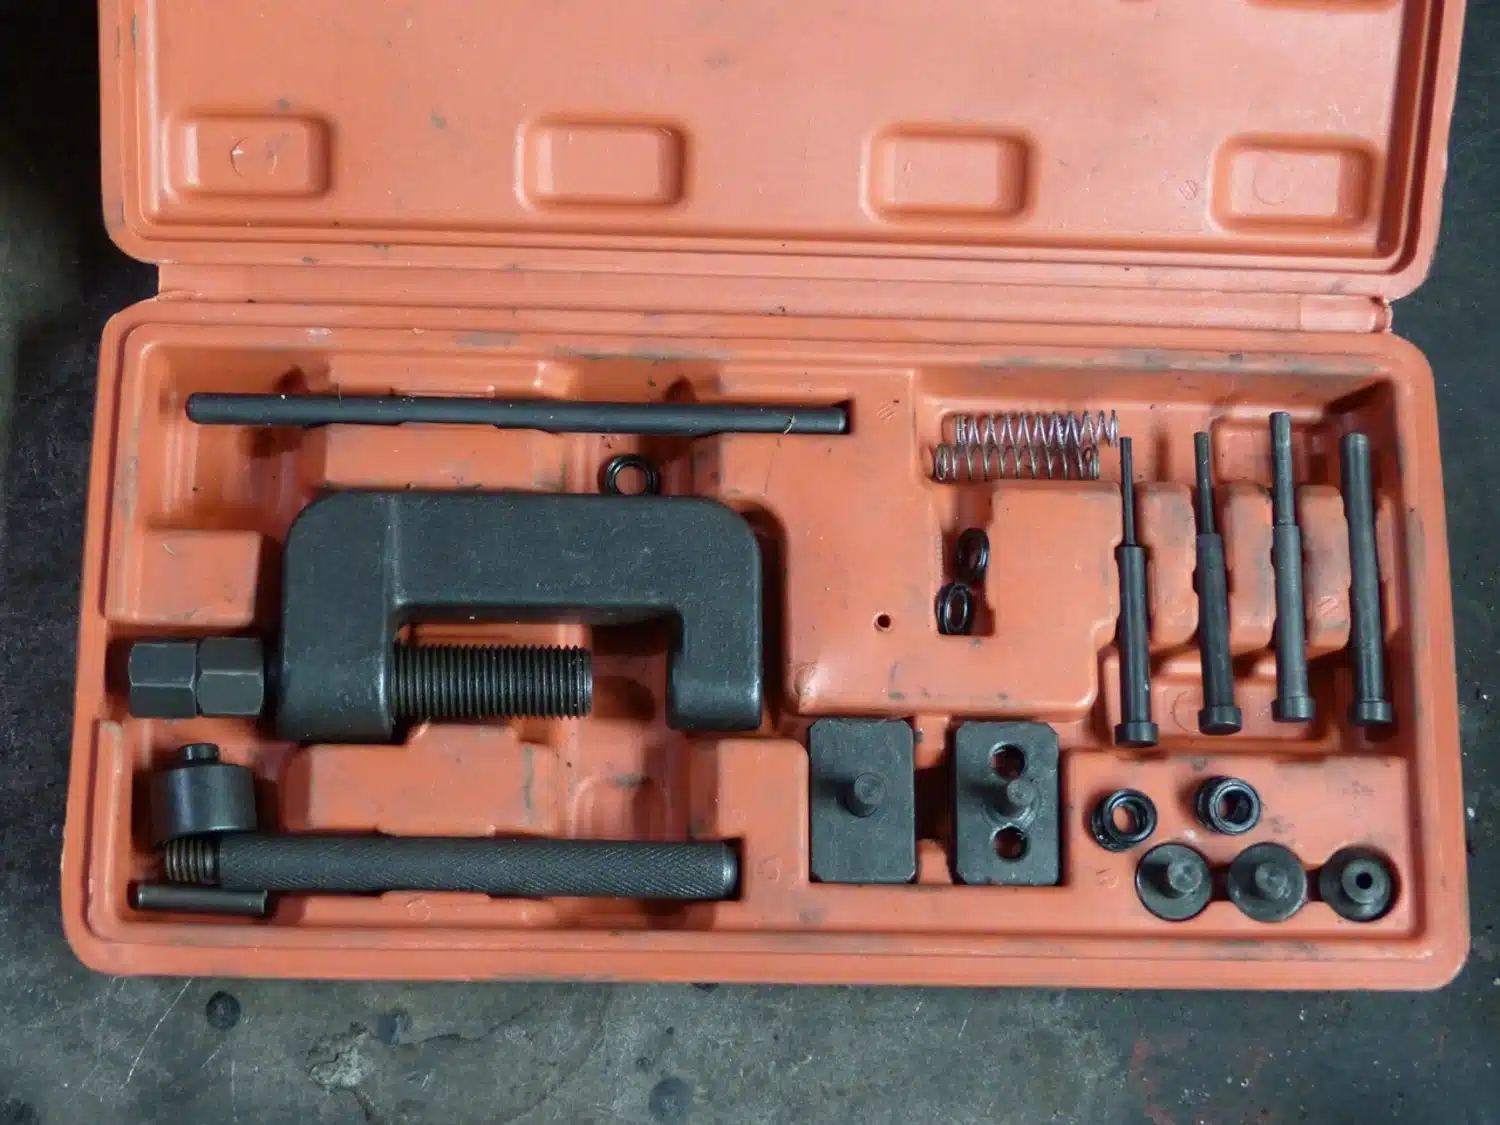
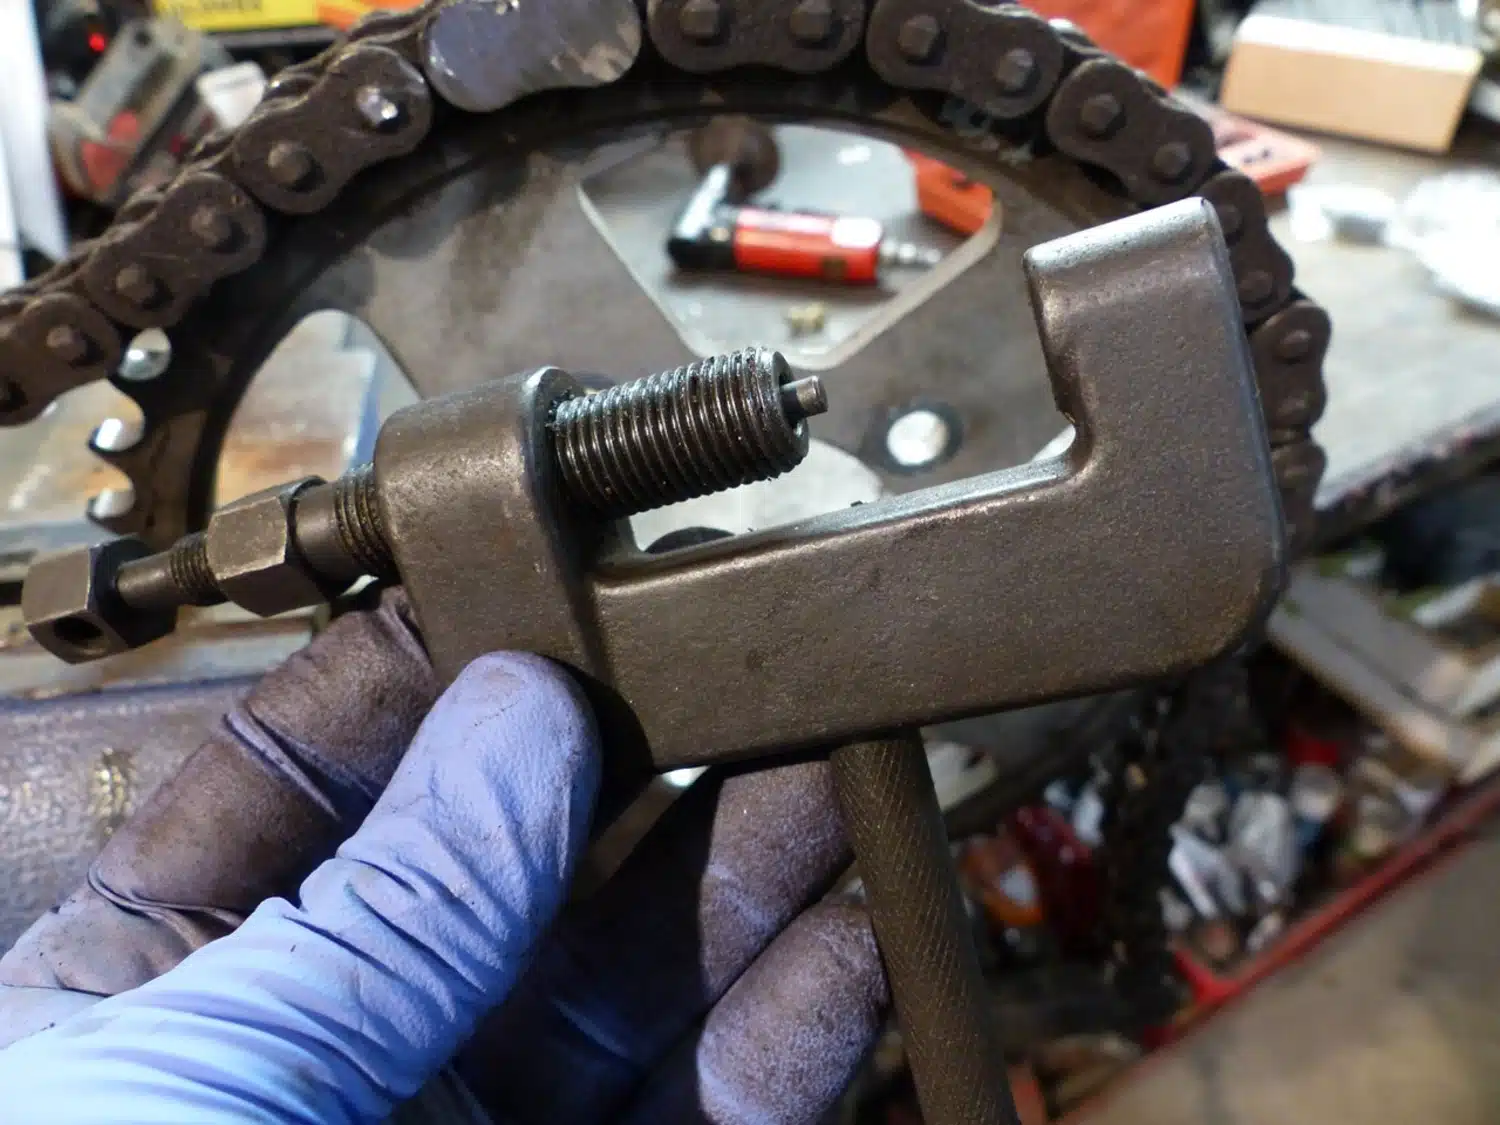
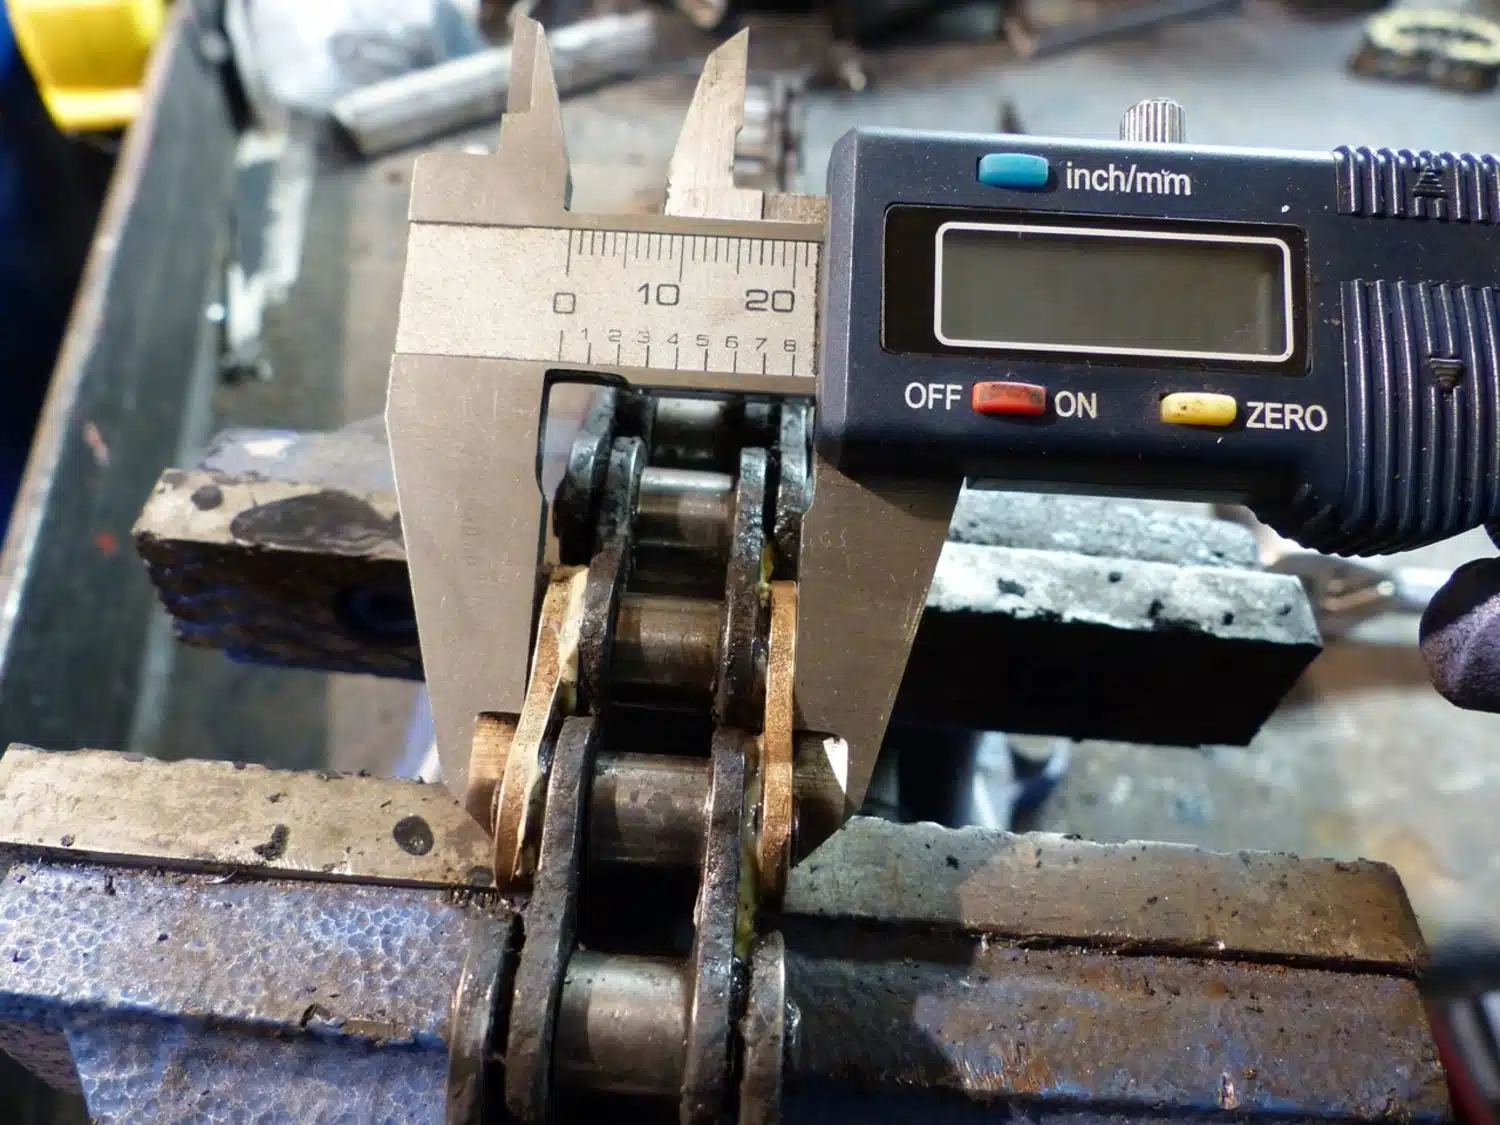
The O-ring link is a little more difficult to install. Installation begins with the insertion of one O-ring per link pin. Grease the pins. Connect the chain and insert the other two well-greased O-rings on the other side. Insert the plate onto the link pins. At this point, compared with the regular link, it is impossible to insert the clip lock. The O-ring prevents deep insertion of the plate. Kimpex tool #000809 is very useful at this stage. It allows you to precisely push the plate to clear the space for inserting the clip lock. Be careful not to push it in too deeply. This makes the chain rigid at this point and risks damaging its O-ring. Some link manufacturers will supply a shim specially designed to be inserted into the chain. This prevents over-insertion of the plate. If you don’t have such a shim, measure the width of a chain link with a caliper. Reproduce this measurement on the chain you’re installing. If you don’t have the Kimpex installation tool at your disposal, a small wrench and vise-grips will do the trick.

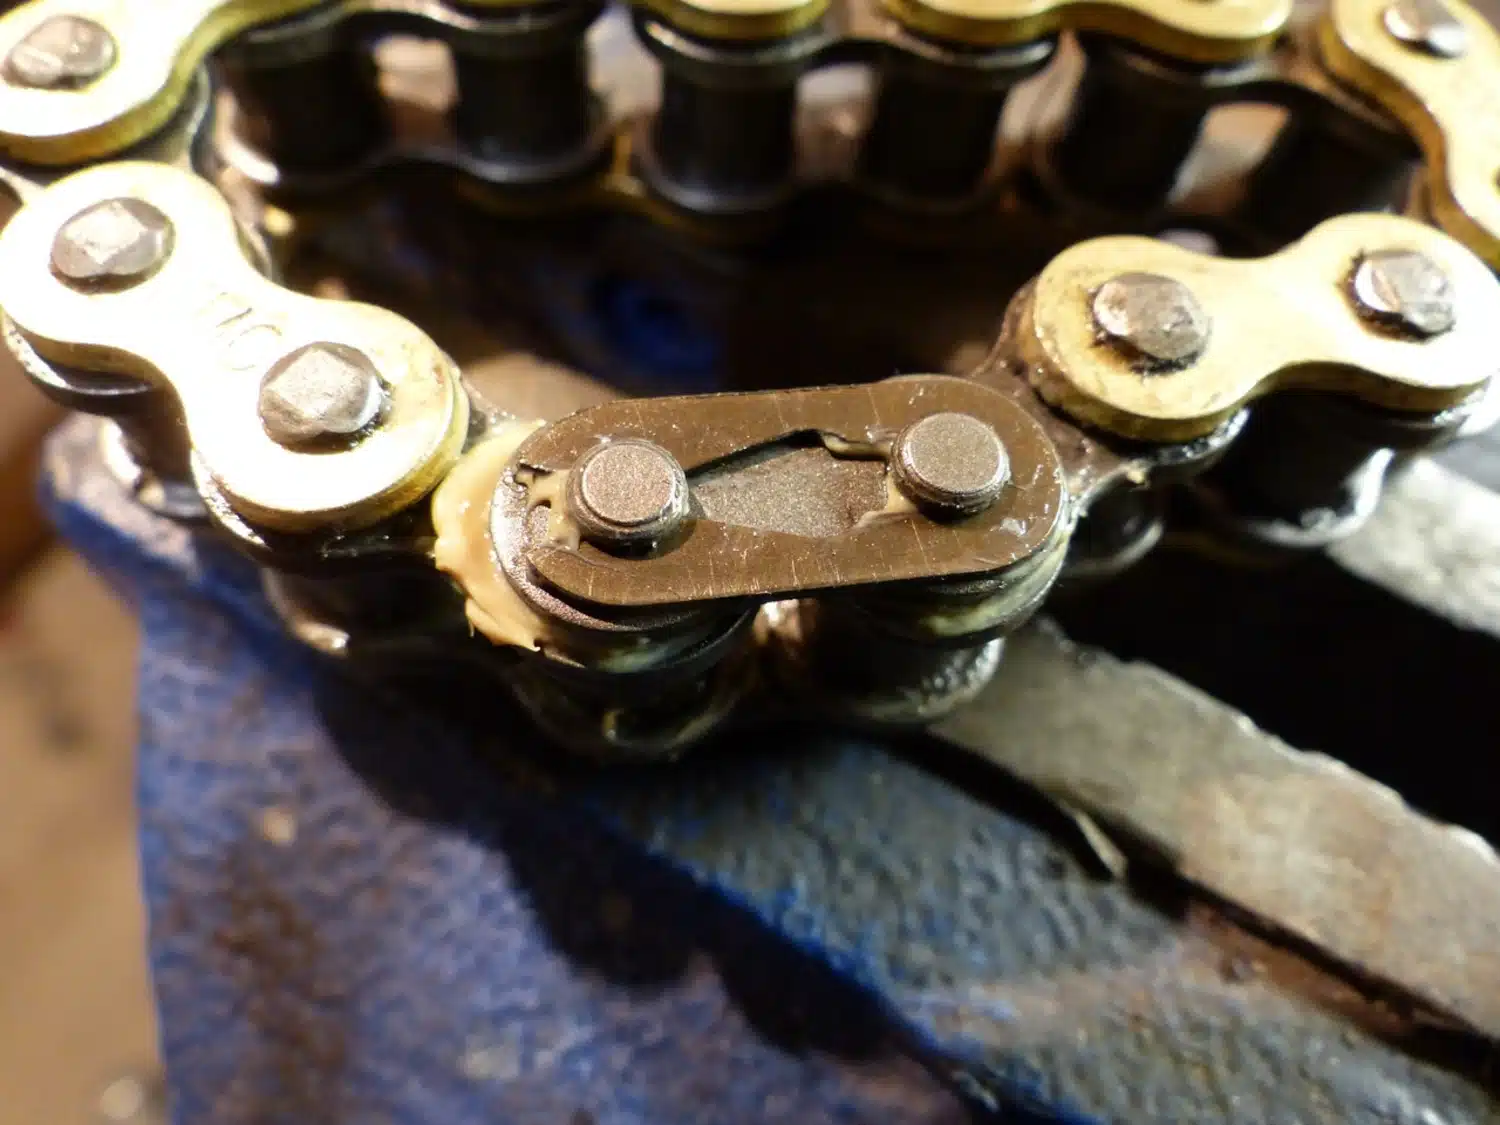
The riveted O-ring link
This link is generally used on medium- to large-displacement motorcycles.
The riveted O-ring link is installed in exactly the same way as the O-ring and clip link. The difference is that there is no clip lock. The link is locked in place by riveting the pins. Here again, Kimpex tool #000809 easily does the job. Without the tool, multiple short blows with a ball peen hammer will properly rivet the link pins.
The screw-in O-ring link
This link is generally suitable for large-displacement motorcycles.
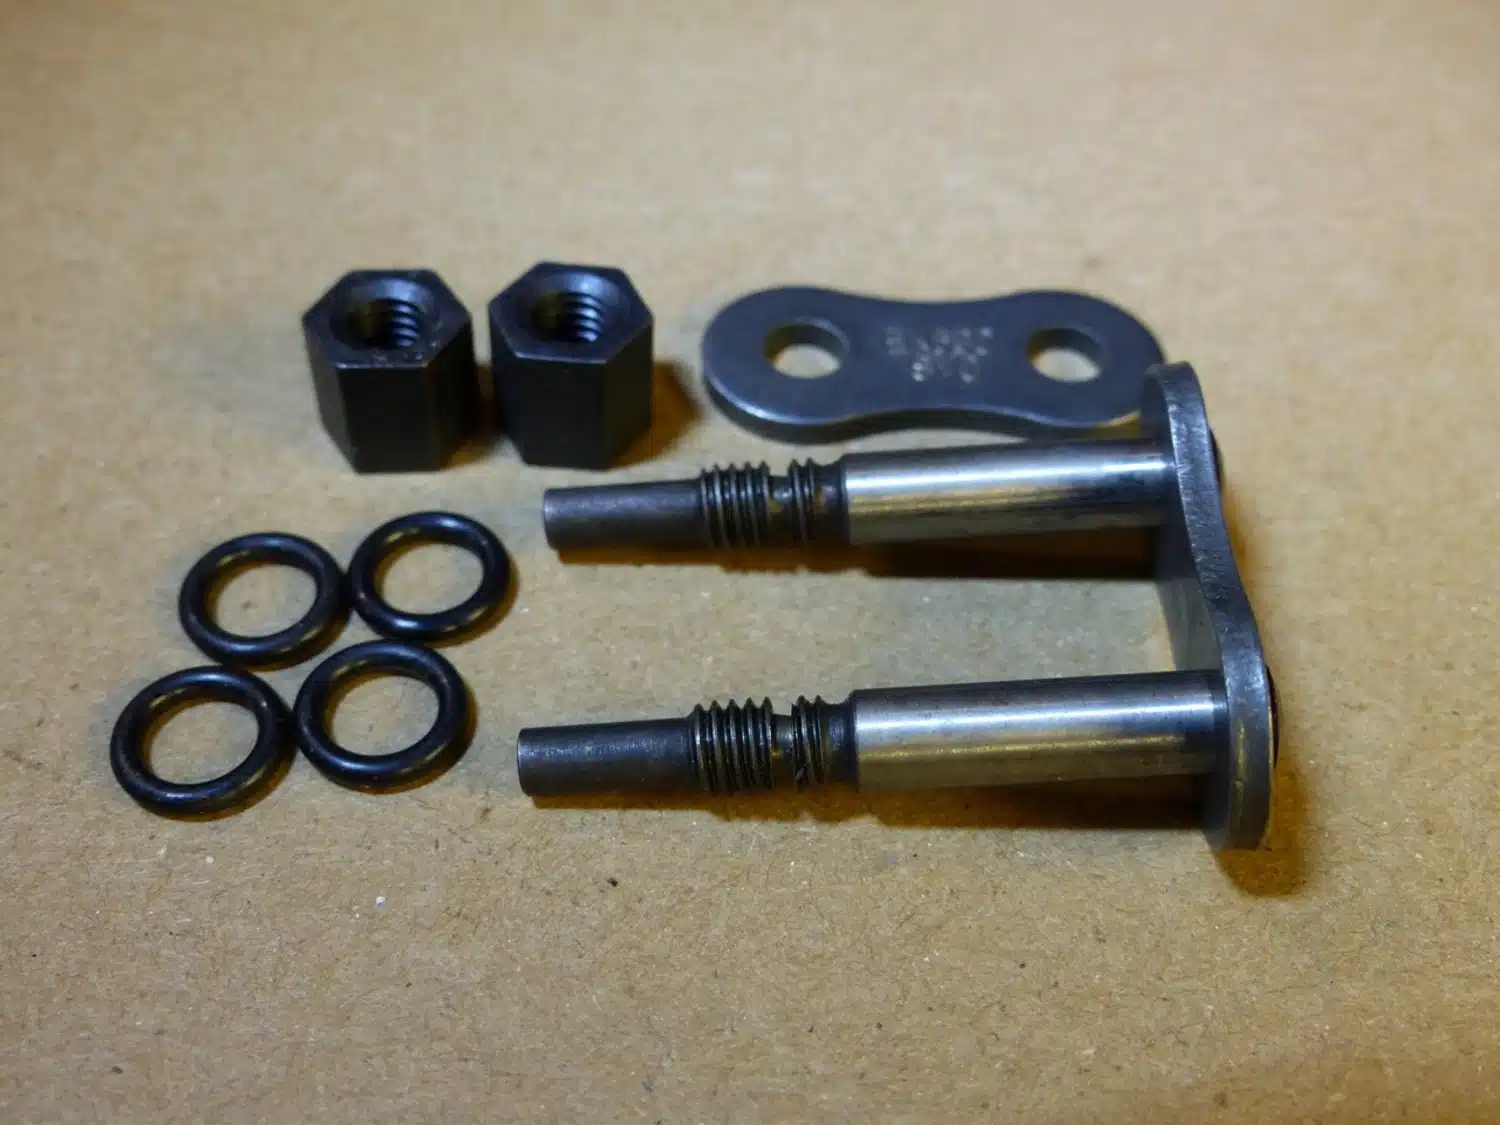
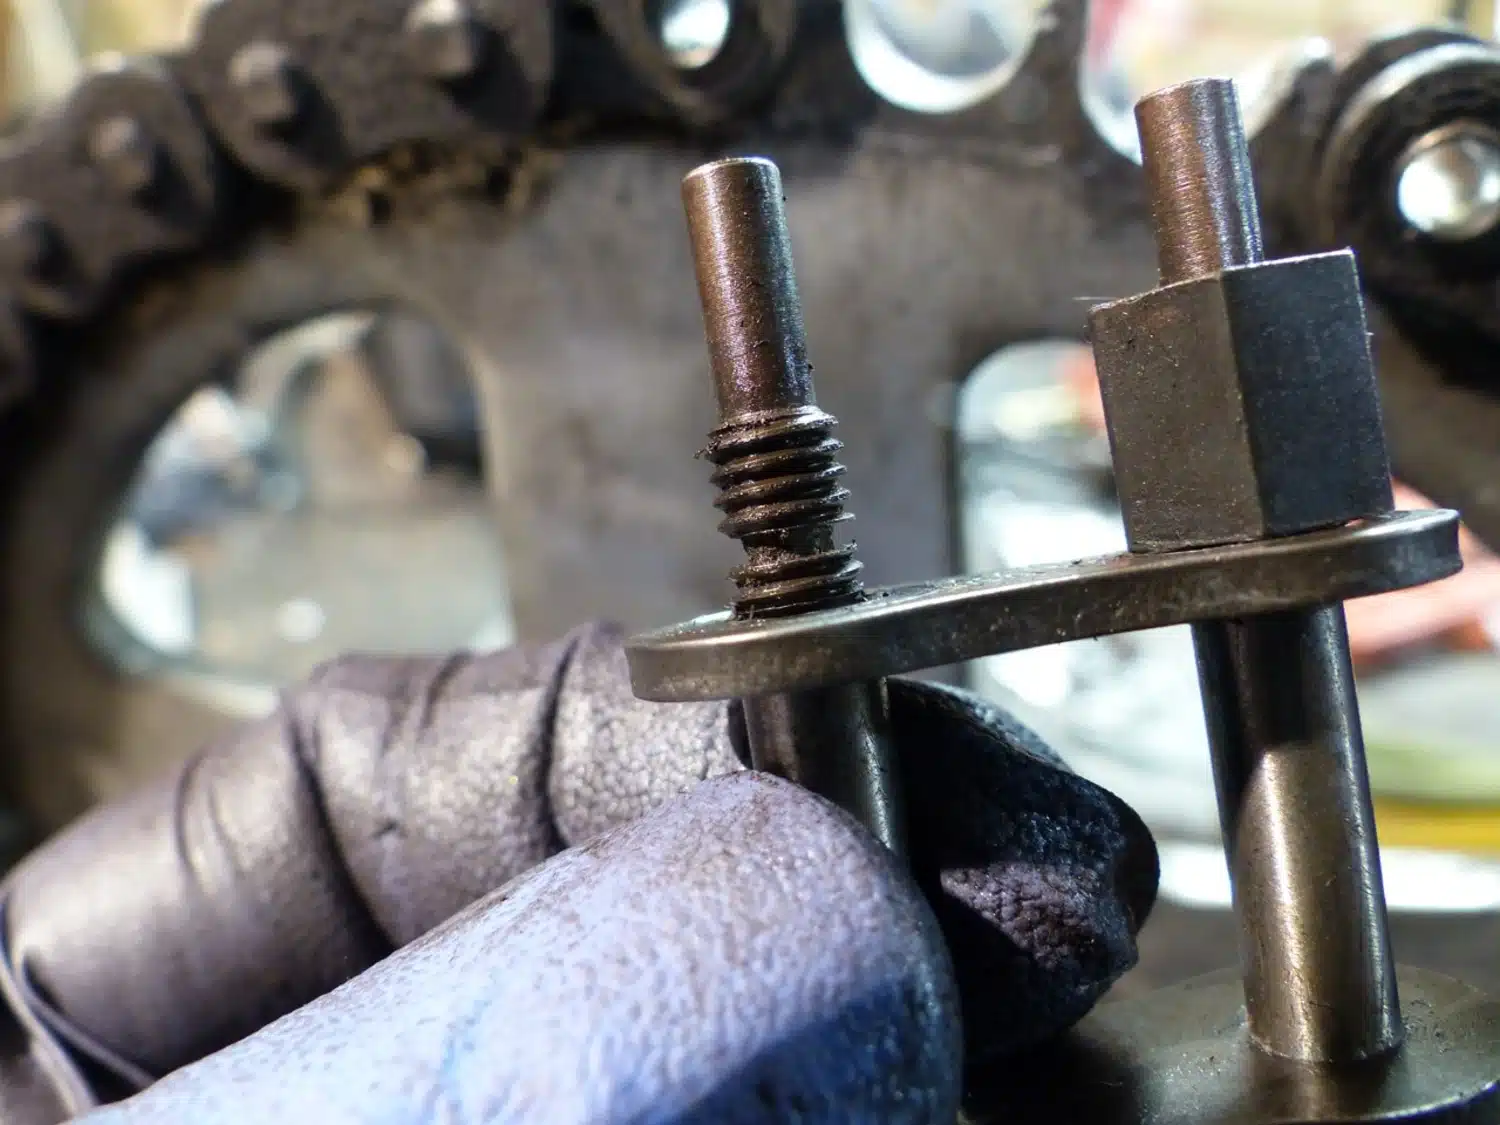
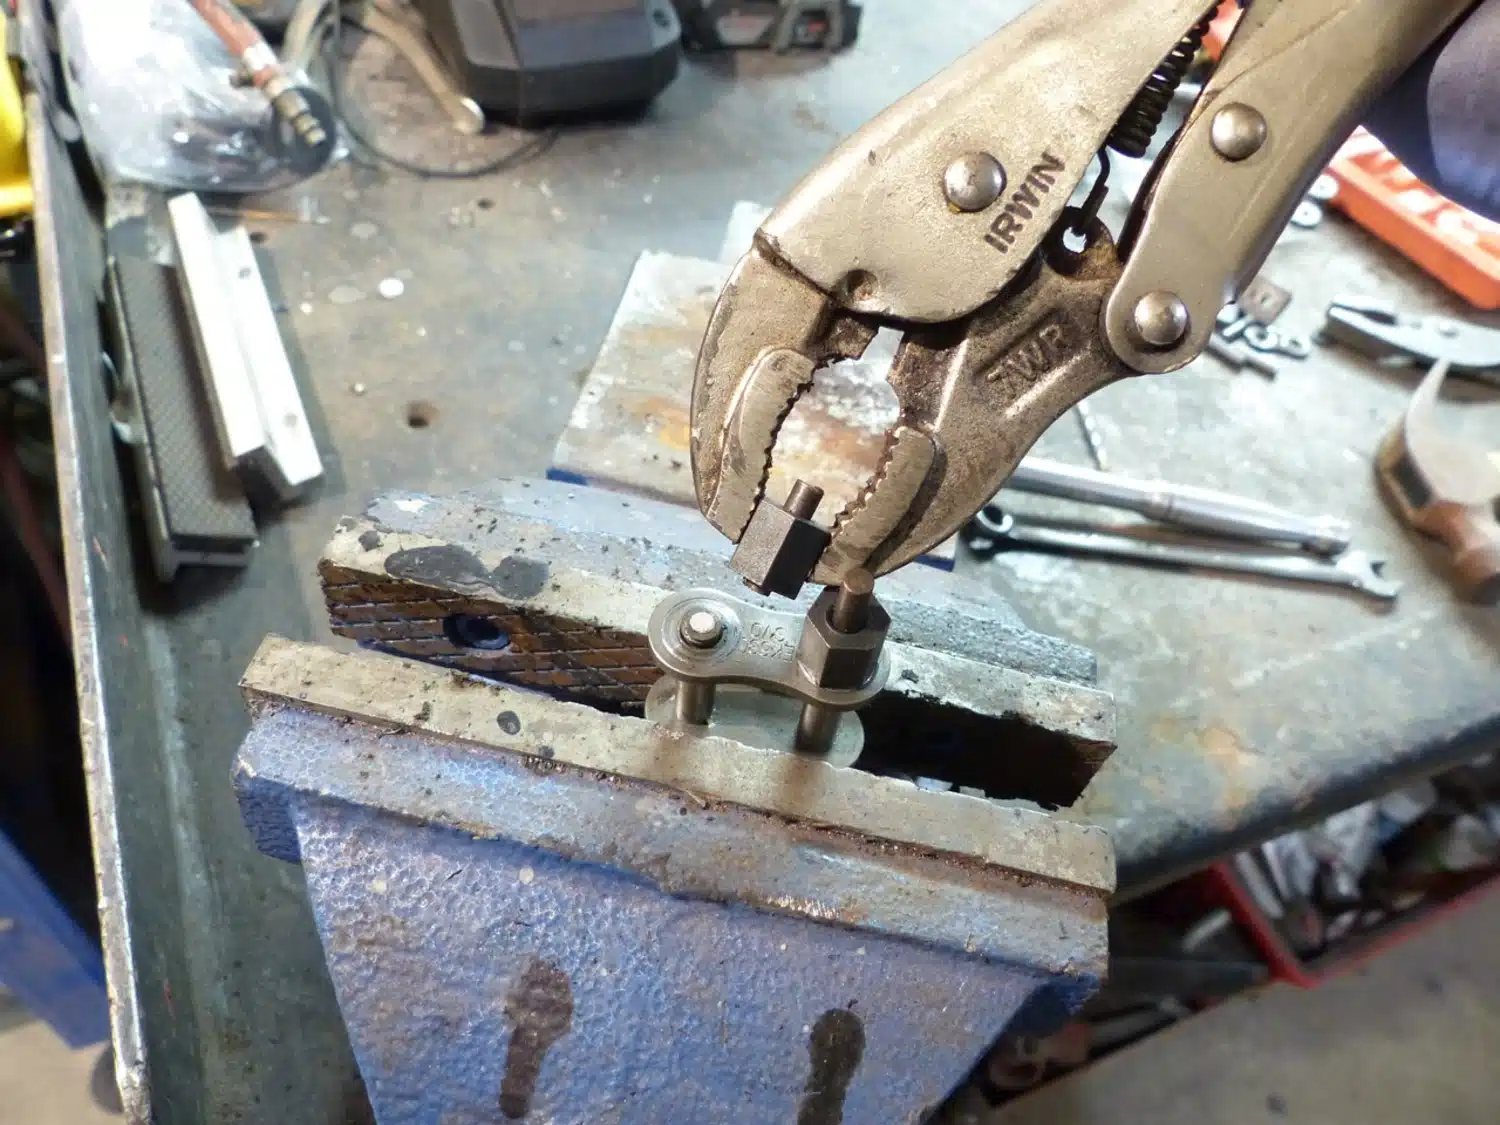
It is installed in the same way as other O-ring links. It has the advantage of being self-installing. No specialized tools are required. Simply screw on the two nuts in 60-degree increments. The plate will position itself. When the caliper shows the width of the other links, stop and unscrew the nut by three or four turns. Finally, using a pair of vice-grips, break off the threaded rod. It’s that simple!
Whatever the reason for installing a chain link, it’s possible to find one to suit your needs. For those who want the option of being able to troubleshoot on the road, and even more so off-road, opt for a regular clip-on link. It’s easier to install. When you get home, remove it and replace it with the model that’s just right for your motorcycle’s chain.
Happy riding!